DIY Polaroid Guest Book With Personalized Message Cards
A traditional guest book captures names and short notes, but it rarely captures the people and personality of the celebration. This DIY Polaroid guest book combines handwritten messages with instant photos, creating a keepsake that feels much more personal.
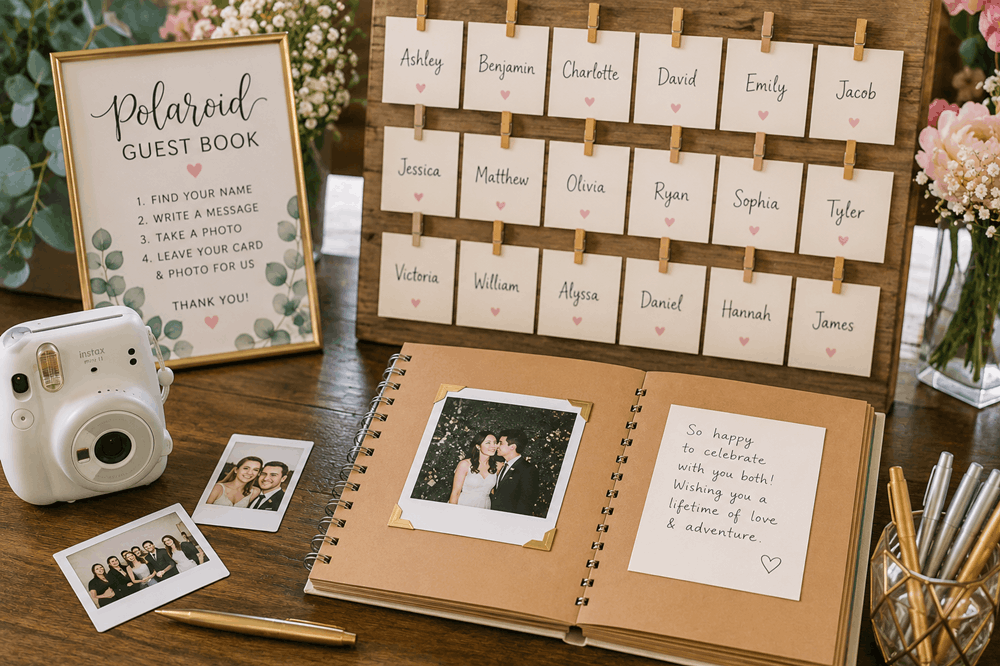
Instead of asking guests to place photos directly into an album, this version begins with individual name cards. Each guest finds their card, writes a message on the back, and takes a photo with the guest of honor. Afterward, the message card and matching picture are placed side by side in an album.
The name cards make the activity easier to organize, encourage everyone to participate, and help the host see which guests have completed their entries.
Although people commonly call this a Polaroid guest book, this tutorial uses Fujifilm Instax Mini film. The compact prints are a convenient size for pairing with matching message cards inside an album.
The same idea can be adapted for:
- Weddings
- Bridal showers
- Engagement parties
- Baby showers
- Birthdays
- Graduation celebrations
- Anniversary parties
- Retirement gatherings
Project Overview
Difficulty: Beginner
Preparation time: About one to two hours
Event setup time: About 20 minutes
Best for: Small and medium-sized celebrations
Main expense: Instax Mini film
What You Will Need
- Cardstock in a color that suits the event
- Paper cutter, craft knife, or scissors
- Pencil and ruler
- Instax Mini camera or smartphone printer
- Instax Mini film
- Photo album with Instax Mini-sized pockets
- Pens or fine-tip markers
- Corkboard, acrylic sign, pegboard, mirror, or another display surface
- Washi tape, clips, pins, or removable adhesive
- Small instruction sign
- Extra film
- Spare camera batteries or a charged printer
- Optional decorative labels, ribbon, flowers, or stickers
Choose cardstock that is thick enough to handle comfortably but not so bulky that it becomes difficult to slide into the album pockets.
How the Guest Book Works
Before the celebration, you create one cardstock card for each expected guest and write a name on the front.
At the event, the cards are arranged on a board or wall. Guests find their names, remove their cards, and write messages on the back. Each person then takes a photo with the bride, couple, expectant parent, birthday guest, or other guest of honor.
Once the event is over, every photo is paired with its matching card in the album.
This approach gives each album spread a simple structure:
- The guest’s photograph on one side
- The guest’s handwritten message on the other
Because the name cards disappear from the display as people participate, the board also acts as an informal checklist.
Step 1: Choose Between an Instant Camera and Smartphone Printer
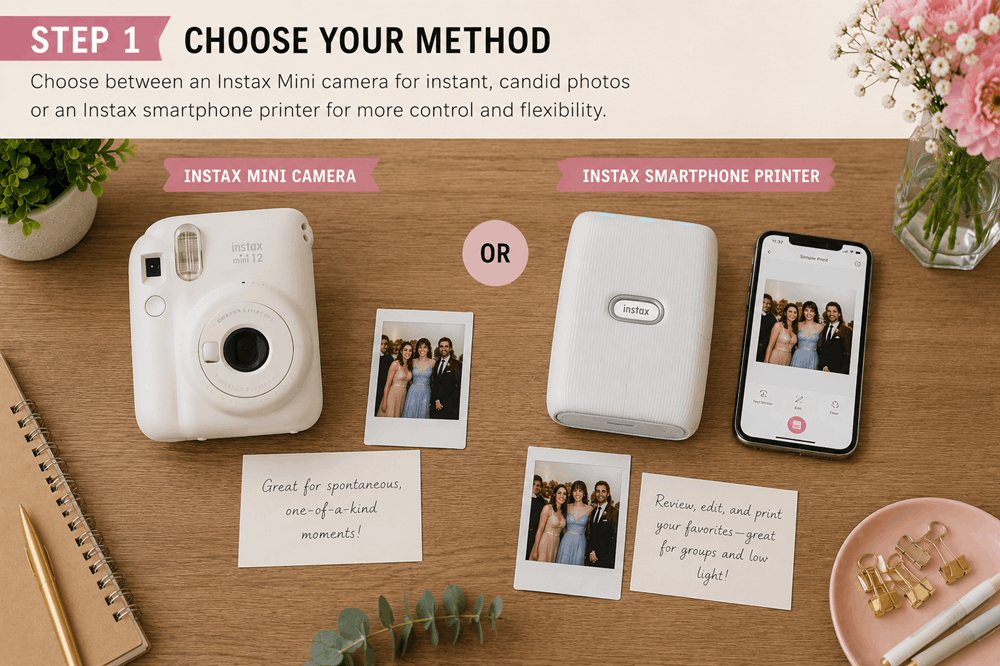
Both options create Instax Mini prints, but the experience is slightly different.
Use an Instax Mini Camera for Spontaneous Photos
An instant camera gives guests the familiar experience of taking a picture and watching it develop.
This option works well when:
- You want candid, one-of-a-kind pictures
- The venue has reliable lighting
- Guests are comfortable using the camera
- A helper can reload film and assist with photos
The unpredictable expressions and small imperfections are part of the charm. However, every exposure uses a sheet of film, even when someone blinks or the framing is poor.
Use an Instax Smartphone Printer for More Control
An Instax Link smartphone printer lets you select and print images saved on a phone through the official app. Fujifilm says its Link printers can print smartphone images as Instax photos, with current models producing a print in roughly 15 seconds.
A printer may be the better choice when:
- You want to review each picture before printing
- The venue lighting is difficult
- You want to take several versions of a group photo
- A designated helper will take and print the pictures
- You want to avoid wasting film on closed eyes or poor framing
The printer also makes it easier to use the phone camera’s timer, portrait mode, or wide-angle lens.
Whichever method you choose, test the equipment before the event and make sure the person managing it knows how to load film and operate it.
Step 2: Calculate How Many Cards and Film Packs You Need
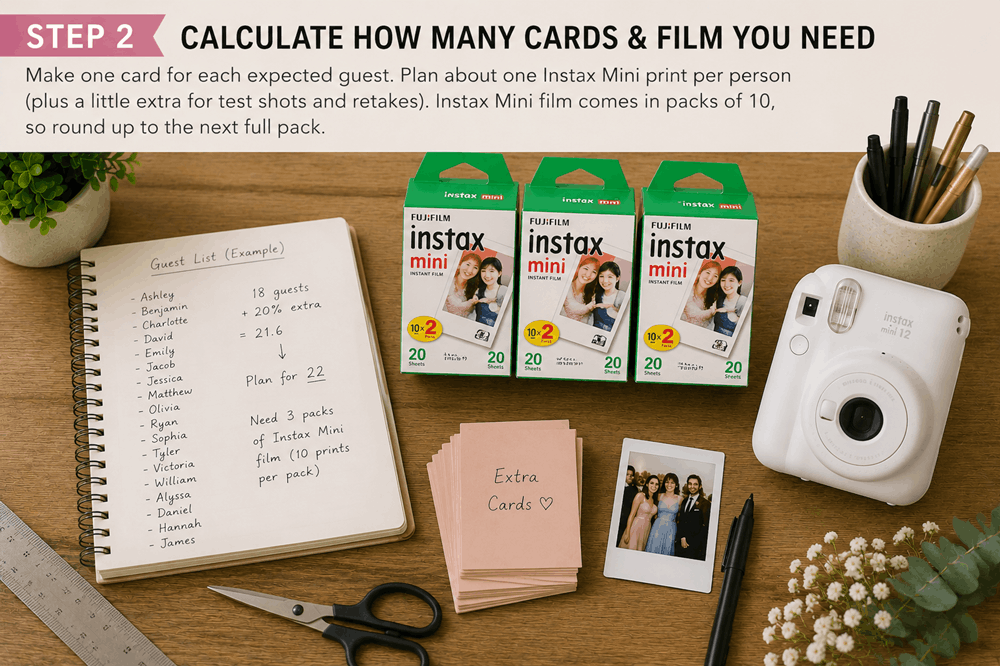
Create at least one card for every person on the guest list.
For a couple-based wedding guest book, you could create one shared card per couple, but individual cards usually result in more personal messages. For a shower, birthday, or smaller gathering, one card and one photo per guest is generally manageable.
Instax Mini film comes in packs of 10, so round your estimate up to the next full pack.
It is also sensible to buy a little extra film for:
- Test pictures
- Retakes
- Accidental exposures
- Group photographs
- Unexpected guests
For example, a 40-person gathering could require 40 planned prints plus an additional pack for testing and retakes.
Keep most unopened film with the event helper rather than placing every pack at the station.
Step 3: Cut the Personalized Message Cards
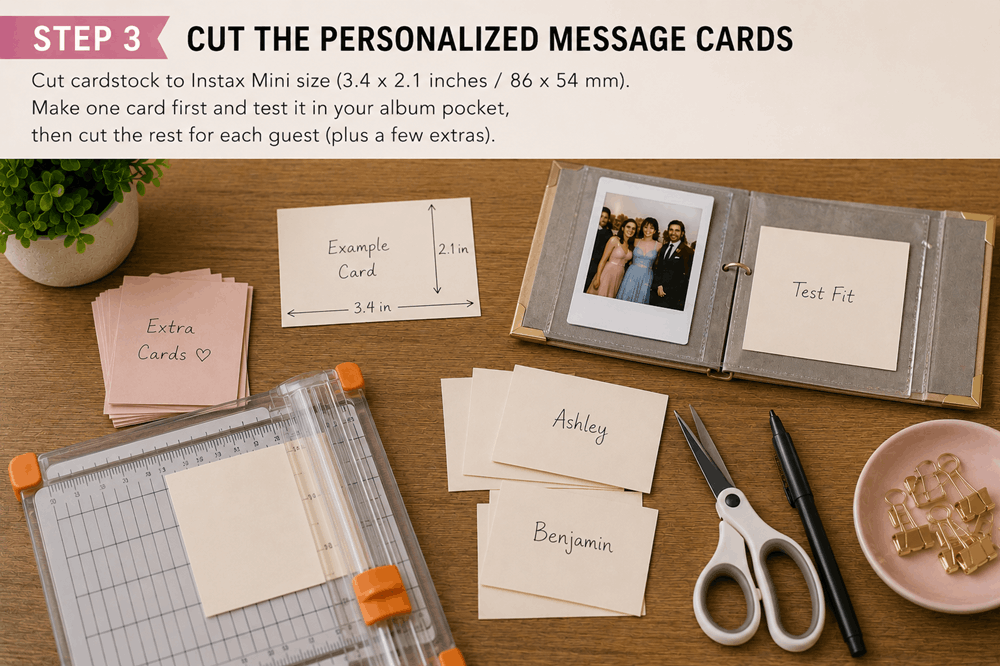
Instax Mini film measures 86 by 54 millimeters, or approximately 3.4 by 2.1 inches.
Cut the cardstock to the same dimensions so each message card matches the size of an Instax Mini print.
A paper cutter is the quickest way to create consistent cards. You can also use a metal ruler, craft knife, and cutting mat.
To make the cards:
- Measure a 3.4-by-2.1-inch rectangle on the cardstock.
- Cut one card and test it inside the album.
- Use that first card as a template for the others.
- Cut enough cards for every expected guest.
- Add several blank extras for unexpected attendees.
Test the card inside the album pocket before cutting the full set. Some albums have slightly tighter sleeves, and a very small adjustment may help the cards slide in more easily.
Step 4: Write the Guest Names
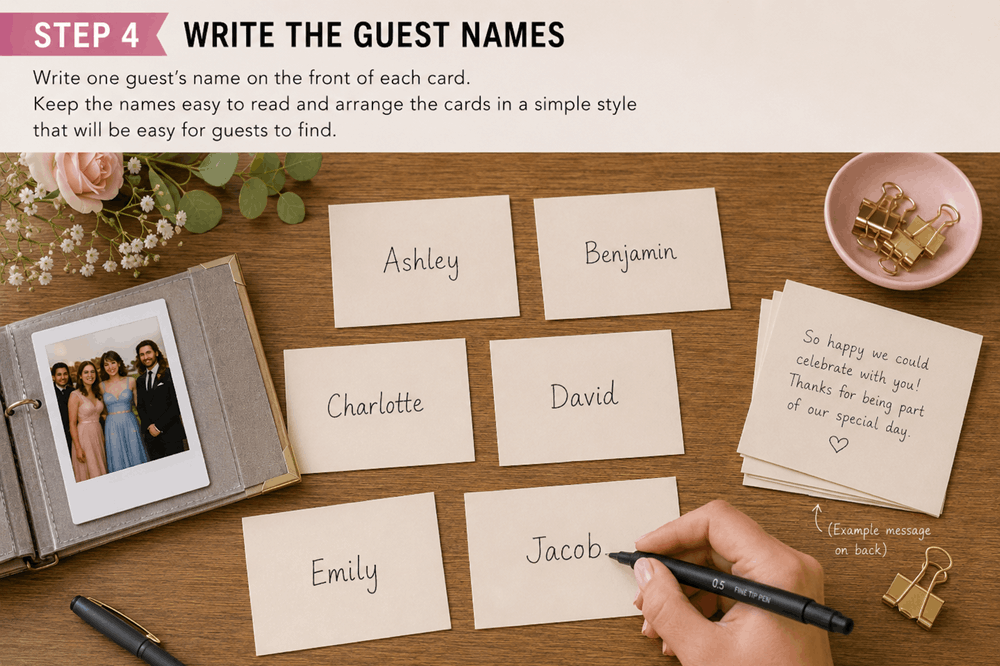
Write one guest’s name on the front of each card.
You can hand-letter the names, use a neat printed style, add adhesive labels, or print directly onto the cardstock before cutting it.
Keep the front simple so names are easy to find. Decorative details can be added around the edges without making the display difficult to read.
Possible styles include:
- Modern calligraphy
- Simple uppercase lettering
- Typewritten labels
- Gold or white ink on dark cardstock
- Small floral or botanical accents
- Event-themed borders
- Different colors for families or table groups
Write the names in alphabetical order if you plan to arrange them that way on the display.
On the back of one sample card, add an example message. This will show guests how much room they have and what kind of note they might leave.
A brief message works best:
Wishing you a lifetime of laughter, adventure, and wonderful memories together.
Guests can write a wish, favorite memory, piece of advice, or a few words about the day.
Step 5: Create the Name-Card Display
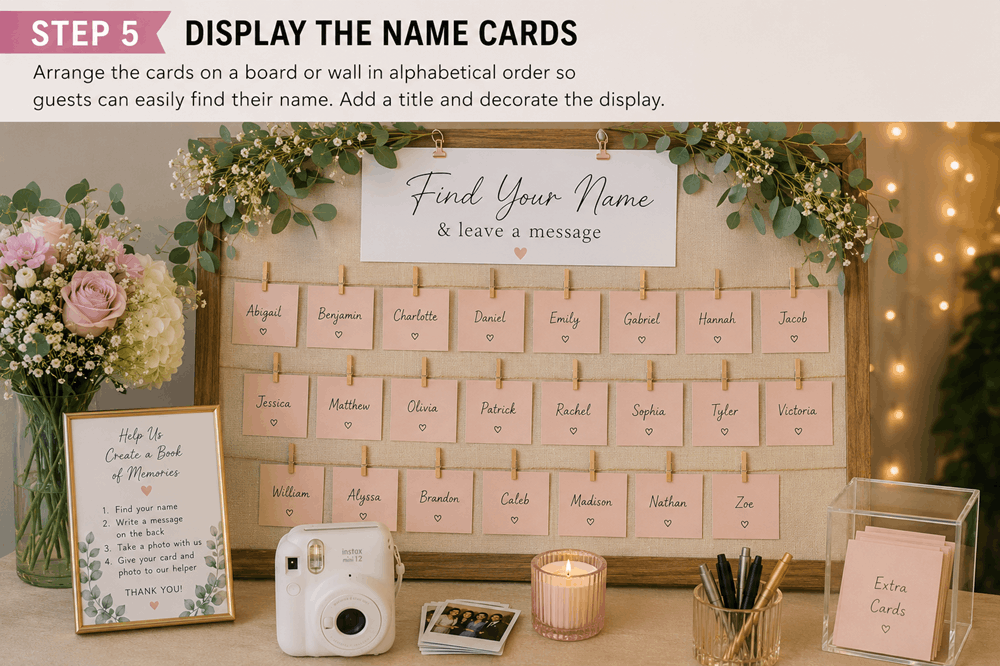
Choose a display that suits the venue and event style.
Good options include:
- Corkboard with pushpins
- Acrylic board with removable tape
- Framed wire grid with small clips
- Large mirror with removable adhesive
- Fabric-covered board
- Pegboard with mini clothespins
- Clean wall with decorative washi tape
Arrange the names alphabetically so guests can find their cards quickly. For a small gathering, arranging them by table or family can also work.
Leave enough space between cards for people to remove them without pulling down the cards beside them.
Add a clear title above the display, such as:
Find Your Name and Leave a Message
The cards become part of the decorations while also giving guests a simple activity to complete.
Step 6: Prepare a Short Instruction Sign
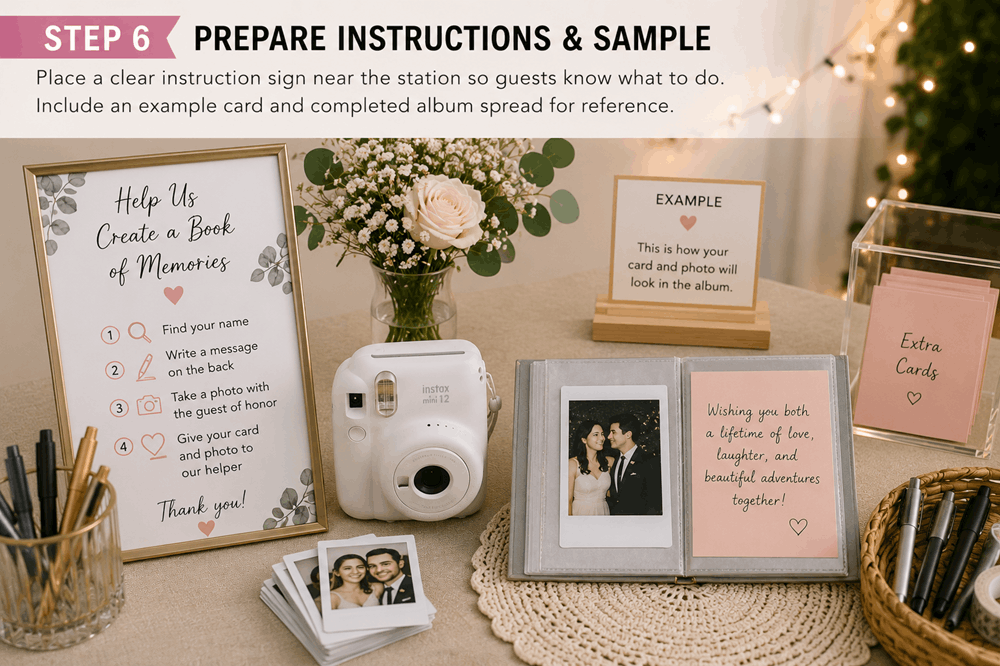
Do not expect guests to understand the system without guidance. Place a small sign beside the card display or photography area.
Suggested wording:
Help Us Create a Book of Memories
- Find your name card.
- Write a message on the back.
- Take a photo with the guest of honor.
- Give your card and photo to our helper.
If guests are using an instant camera themselves, add:
Let your picture develop flat. Please do not shake it.
Fujifilm explains that Instax photos gradually develop over approximately 90 seconds and recommends holding them steady rather than shaking them.
A sample card and completed album spread will make the instructions even easier to understand.
Step 7: Set Up the Photography Area
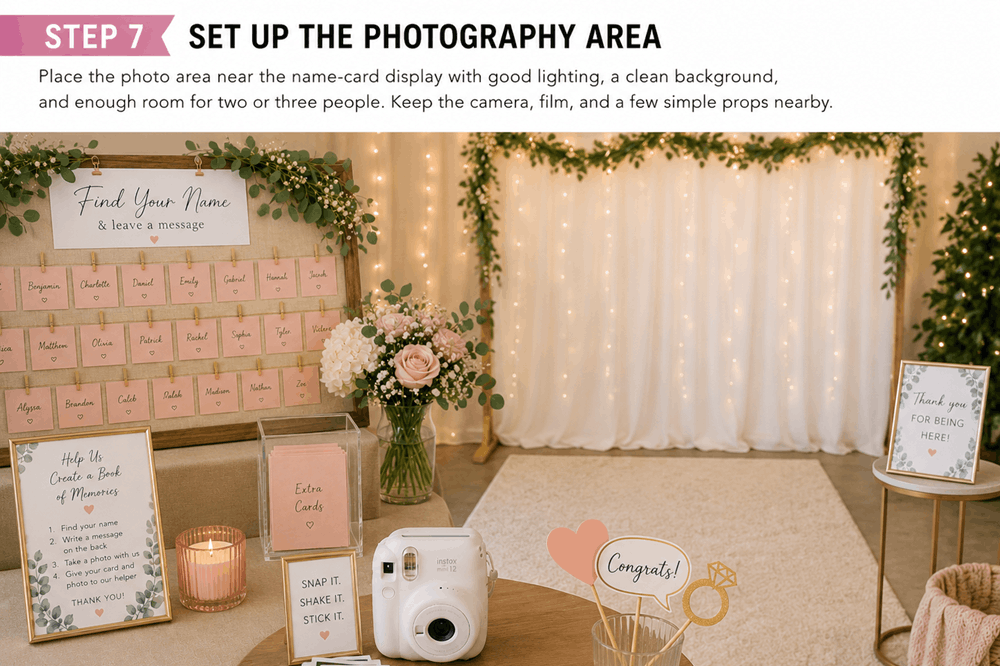
Place the photo area close to the name-card display, but leave enough room for people to gather without blocking others.
Choose a location with:
- Good, even lighting
- An uncluttered background
- Enough space for two or three people
- A nearby table for the camera, printer, and film
- Protection from food and drinks
A simple backdrop can make the photographs feel more consistent. You might use a plain wall, fabric curtain, floral arrangement, balloon display, or decorated panel.
Keep props limited. A few event-appropriate items can add personality, but too many may slow down the process and make the station look cluttered.
Step 8: Collect Each Message and Photo Together
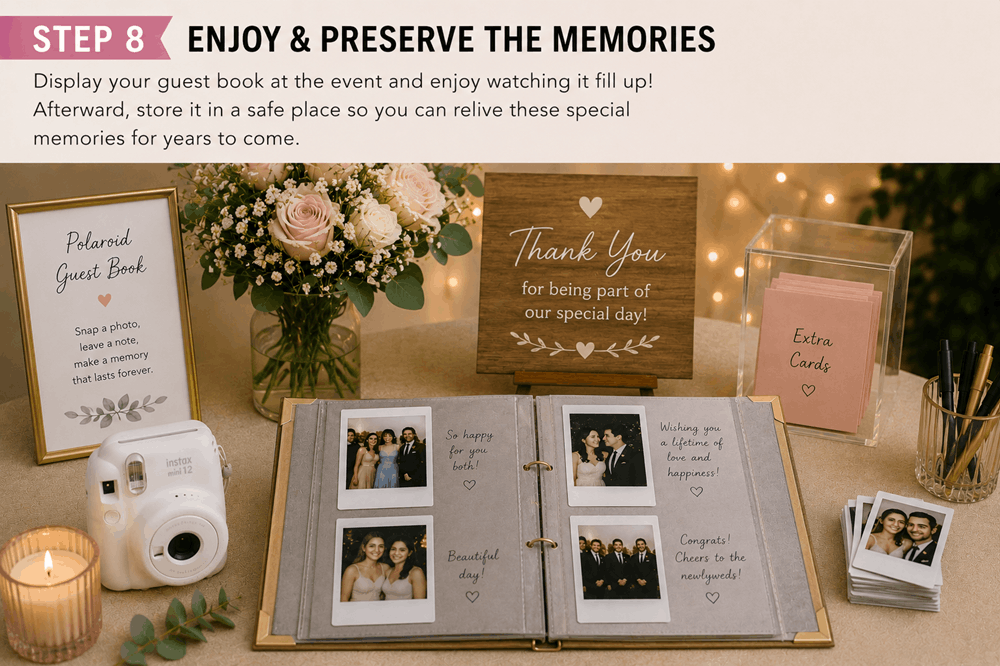
The easiest way to avoid mismatched entries is to have one person manage the completed cards and pictures.
After a guest writes a message and takes a photo, the helper should keep the two items together.
Possible organization methods include:
- Placing each card beneath its developing photo
- Using small labeled envelopes
- Clipping each card and picture together after development
- Inserting them into the album immediately
- Arranging completed pairs in a divided storage box
Do not leave a pile of unlabeled photographs on the table. By the end of a busy celebration, it may be difficult to remember which picture belongs with each message.
Instax images usually take about 90 seconds to develop fully, so give each print space to rest flat before handling it repeatedly.
Step 9: Assemble the Guest Book
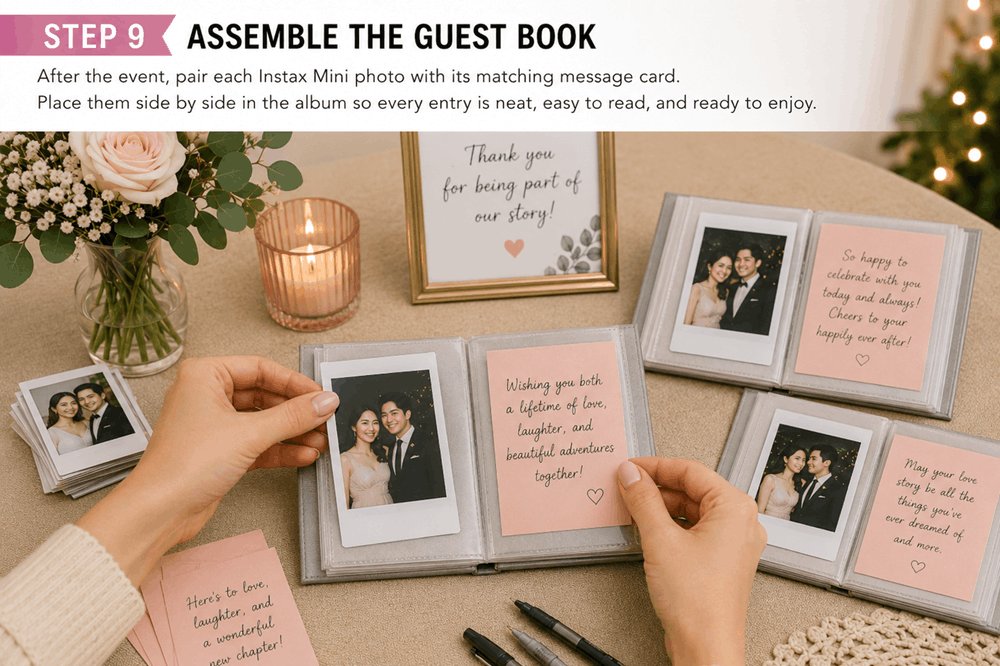
You can assemble the album during the event or complete it afterward.
Putting it together after the celebration is often easier because you can:
- Check that every card has the correct photo
- Arrange the entries in a consistent order
- Replace any weak or damaged album sleeves
- Add event details and decorations
- Include group photos or unused cards
- Leave space for late messages
Place the photo and message card beside one another so both can be viewed at the same time.
Depending on the album layout, you might use:
- One photo and one card on each spread
- A pair of adjacent pockets
- Two guest entries per page
- Photo corners on scrapbook pages
- Clear sleeves sized for Instax Mini prints
Add a title page with the event name and date. You could also include the invitation, menu, program, or a short note from the host.
How to Keep the Activity Running Smoothly
A little supervision can prevent most problems.
Ask a friend, family member, wedding-party member, or event assistant to check the station occasionally.
The helper can:
- Encourage guests to participate
- Take or print photos
- Refill film
- Replace pens
- Keep cards and photos paired
- Assist anyone unfamiliar with the camera
- Collect blank cards from guests who have left
- Check which names remain on the display
The person does not need to stay at the station all day. Regular check-ins are usually enough.
Common Problems and Simple Solutions
Guests Forget to Participate
Ask the host or event organizer to make a short announcement. You can also have a few outgoing guests complete their entries first so others can see how the activity works.
The Name Display Is Hard to Search
Arrange cards alphabetically and use large, readable lettering. For a larger event, divide the board into sections by last-name initial.
Pictures and Messages Become Separated
Have one helper collect every completed pair. Small clips or labeled envelopes can also keep the items together.
Photos Are Too Dark
Move the photography area to a brighter location and test another image. Follow the shooting-distance and flash instructions for the camera you are using.
Film Runs Out Too Quickly
Store the extra packs with the helper and use a smartphone printer when you want to approve images before committing them to film.
Guests Do Not Know What to Write
Add a short prompt to the instruction sign:
Share a favorite memory, a piece of advice, or a wish for the future.
Someone Was Not on the Original Guest List
Keep several blank cards and a matching pen nearby. Add the person’s name before placing the card on the board.
Ways to Adapt the Idea
The same system can be adjusted for different celebrations.
For a wedding, ask guests to share marriage advice or a favorite memory involving the couple.
For a baby shower, invite them to write a wish for the baby or advice for the parents.
At a birthday, guests can record a shared memory or prediction for the coming year.
For a graduation party, messages might include encouragement, career advice, or favorite school memories.
You can also replace individual guest names with household names when film or album space is limited. Each family or couple can create one shared entry.
A Keepsake That Shows Who Was There
The most useful part of this DIY Polaroid guest book is not simply the instant photography. It is the way the personalized cards guide every guest through the activity.
Each card begins as part of the event display, becomes a handwritten message, and eventually sits beside a photograph in the finished album. At the same time, the remaining names help the host see who still needs to participate.
The result is more than a list of signatures. It is a visual record of the people who attended, the messages they shared, and the moments they created with the guest of honor.