
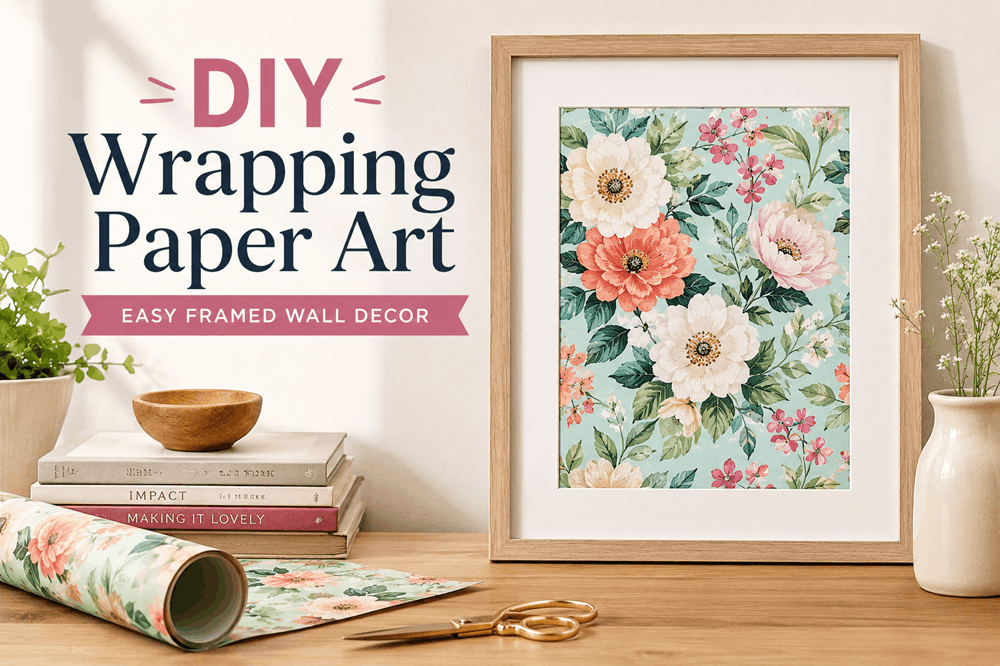
DIY Wrapping Paper Art
Some wrapping paper is simply too pretty to throw away. A floral print, playful illustration, or bold geometric pattern can look surprisingly polished once it is placed inside a frame.
DIY wrapping paper art is an easy way to decorate an empty wall without buying an expensive print. It can also help you reuse leftover gift wrap, preserve paper from a special occasion, or create seasonal artwork that is easy to change.
The project requires no painting or advanced craft skills. With a frame, a carefully selected piece of paper, and about half an hour, you can create wall decor that feels personal to your space.
Project Overview
Difficulty: Beginner
Time needed: About 20 to 30 minutes
Estimated cost: Low, especially if you reuse a frame
Best for: Bedrooms, kitchens, offices, nurseries, entryways, and gallery walls
What You Will Need
- Decorative wrapping paper
- Picture frame
- Frame mat, optional
- Scissors or a craft knife
- Cutting mat, if using a craft knife
- Pencil
- Ruler or straightedge
- Removable tape or photo corners
- Clean microfiber cloth
- A few heavy books
You can use a frame you already own, pick one up from a thrift store, or combine several inexpensive frames to make a coordinated wall display.
Choose Wrapping Paper That Works as Art
Almost any wrapping paper can be framed, but some designs are especially well suited to wall decor.
Look for patterns featuring:
- Flowers or botanical illustrations
- Birds, animals, or nature scenes
- Geometric shapes
- Abstract designs
- Vintage-style artwork
- Maps or city illustrations
- Small repeating motifs
- Colors already used in your room
Think about the size of the design as well as its colors. A large flower or illustrated scene may need a bigger frame, while a small repeating pattern can work well in a compact frame or a group of three.
Before cutting, place the frame mat over different areas of the paper. Moving it around helps you see which section creates the most balanced composition.
The best part of the design may be in the middle of the roll rather than near an edge.
Step 1: Flatten the Paper
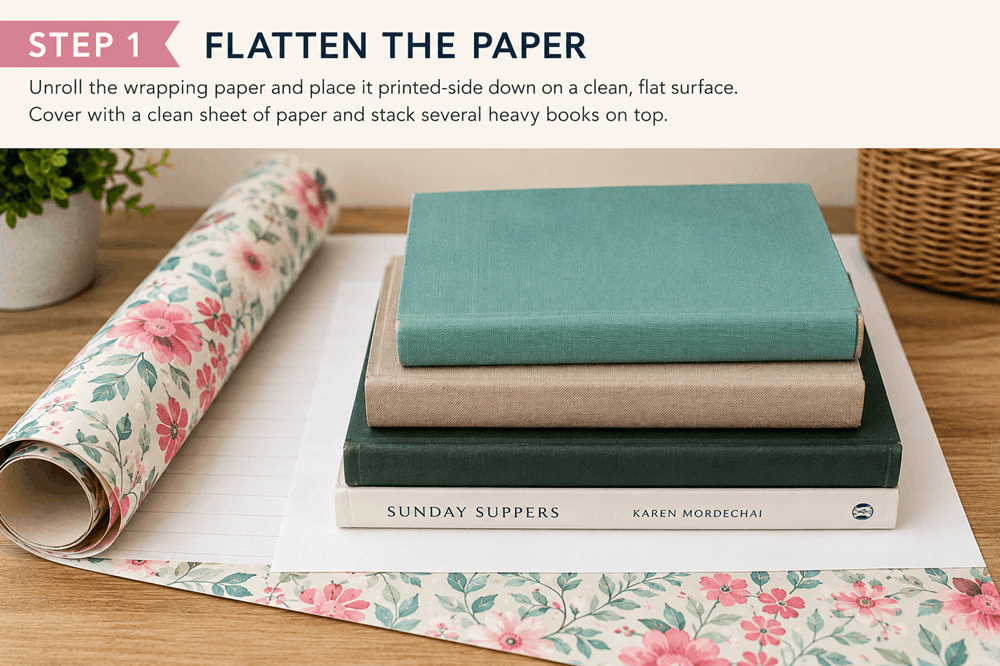
Paper stored on a roll often curls when it is unwrapped. Flattening it first makes measuring easier and helps prevent ripples inside the frame.
Unroll the section you plan to use and place it printed-side down on a clean surface. Cover it with a clean sheet of plain paper, then place several heavy books on top.
Leave it for a few hours or overnight if the curl is strong.
Avoid ironing the paper directly. Heat can damage metallic finishes, glossy coatings, delicate inks, or other decorative surfaces.
Step 2: Select the Best Part of the Design
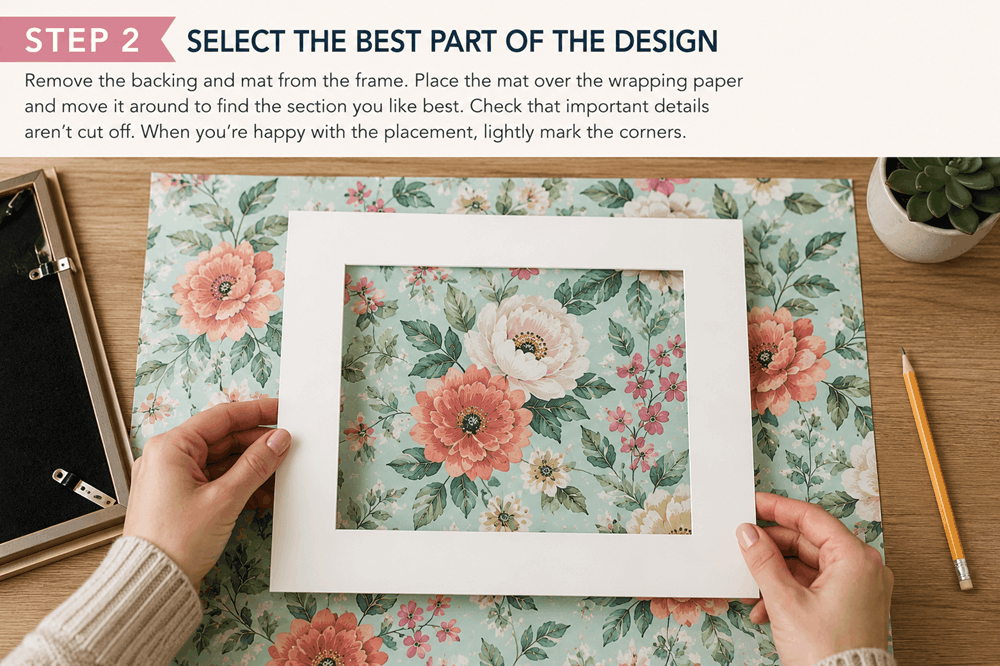
Remove the backing and mat from the frame. Place the mat over the wrapping paper and move it around until you find a section you like.
Look at the design as a complete picture rather than simply choosing the first part of the roll.
Check whether important details will be cut off. A flower, animal, face, or other recognizable subject may look awkward if the mat opening crops it in the wrong place.
The main design does not always need to sit directly in the center. An off-center flower or illustration can look more interesting when there is enough open space around it.
Once you are happy with the placement, lightly mark the corners on the back of the paper with a pencil.
Step 3: Measure and Cut
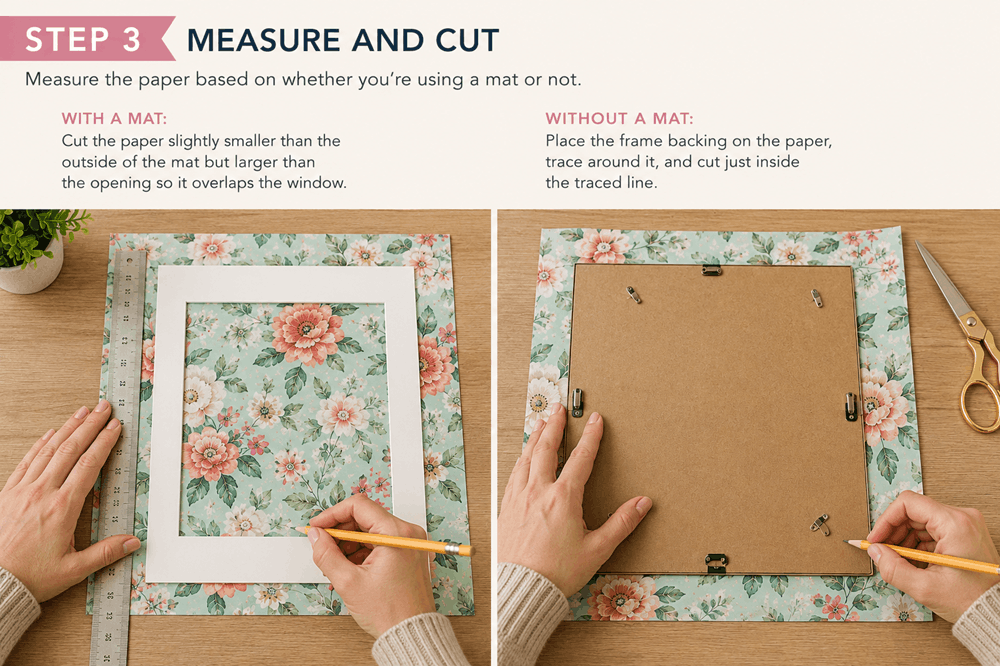
How you measure the paper depends on whether you are using a frame mat.
When Using a Mat
Turn the mat over and place it on the back of the wrapping paper. Trace around the outside edge or make small pencil marks at the corners.
Cut the paper slightly smaller than the outside of the mat but larger than the opening. It only needs to overlap the opening enough to attach securely to the back.
The cut edges do not need to be perfectly neat because the mat will hide them.
When Framing Without a Mat
Remove the frame backing and place it on the back of the wrapping paper. Trace around it with a pencil, then cut just inside the line.
Cutting slightly inside the outline helps the paper fit into the frame without folding or bunching along the edges.
Scissors are fine for most projects. For especially straight edges, use a craft knife with a metal ruler and cutting mat.
Before making the final cut, check the front of the paper once more to make sure you have selected the right part of the pattern.
Step 4: Attach the Wrapping Paper
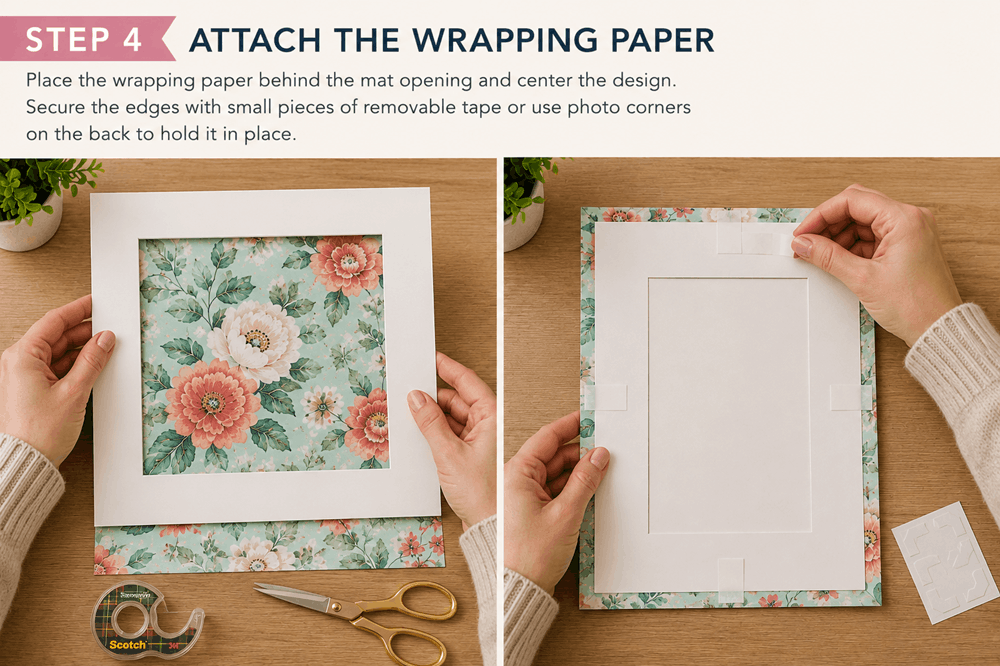
If you are using a mat, place the wrapping paper behind the opening and check the design from the front.
Adjust it until the pattern looks straight and balanced. Turn the mat over while holding the paper in place, then secure the edges with small pieces of removable tape.
Tape only the back edges that will be hidden by the mat. There is no need to cover the entire sheet.
If you are not using a mat, place the cut paper directly against the frame backing. A small piece of removable tape at each corner can help keep it from shifting.
For ordinary gift wrap that you may replace later, removable tape is usually enough. Saving paper from a wedding, birthday, or another meaningful gift? Use photo corners or archival mounting strips so you do not have to place ordinary adhesive directly on it.
The Library of Congress recommends non-adhesive mounting methods, such as photo corners or mounting strips, when framing paper that needs more careful protection.
Step 5: Clean and Assemble the Frame
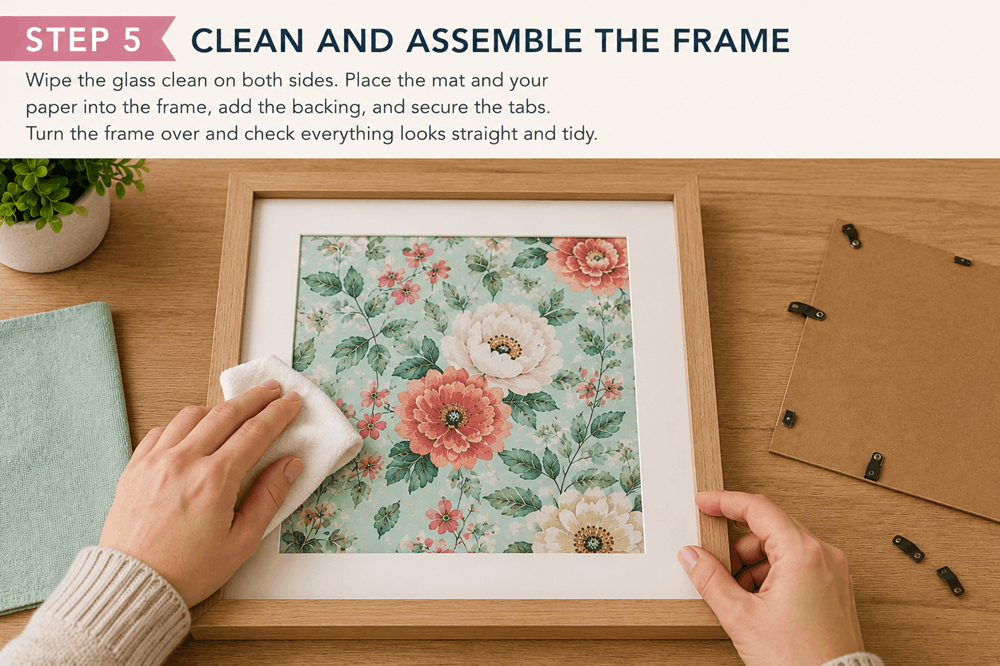
Use a microfiber cloth to clean both sides of the frame glass. Check the corners carefully, since dust and fingerprints become much more noticeable after the frame is closed.
Place the mat and wrapping paper inside the frame. Add the backing and secure the frame tabs or fasteners.
Turn the frame over and inspect the finished piece before hanging it.
Look for:
- Dust beneath the glass
- A crooked pattern
- Wrinkled paper
- Folded edges
- Visible tape
- Uneven spacing around the design
Make any adjustments now rather than noticing them after the frame is on the wall.
Creative Ways to Use Framed Wrapping Paper
One of the best things about this project is how easily it can be adapted.
Create a Matching Set
Cut several different sections from the same roll and place them in matching frames. The pieces will share the same colors and style without looking identical.
A set of two or three frames can fill a larger wall above a desk, console table, or kitchen bench.
Mix Coordinating Patterns
Choose several papers that share one or two colors. Pair a floral print with stripes, dots, or a simple geometric design.
Using similar frames will help the different patterns feel like part of one collection.
Change the Art With the Seasons
Keep the frame and replace the paper throughout the year.
Try:
- Soft flowers for spring
- Bright fruit or coastal patterns for summer
- Leaves and earthy colors for autumn
- Stars, greenery, or snowflakes for winter
Store unused paper inserts flat between sheets of clean cardboard so they are ready for the next season.
Preserve Paper From a Special Gift
A clean section of wrapping paper from a wedding, anniversary, baby shower, or birthday can become a small keepsake.
Write the date and the giver’s name on the frame backing instead of marking the decorative paper.
Frame Other Decorative Materials
The same method works with more than gift wrap. You can also frame:
- Wallpaper samples
- Calendar illustrations
- Decorative shopping bags
- Maps
- Sheet music
- Scrapbook paper
- Fabric remnants
- Children’s artwork
- Postcards
- Handmade marbled paper
Check before cutting an old map, book page, poster, or vintage print. Use a copy instead when the original may have sentimental, historical, or financial value.
Where to Display Your Wrapping Paper Art
Choose a location that complements the pattern and frame.
Framed wrapping paper can add color to:
- A kitchen wall
- A bedroom or nursery
- A home office
- An entryway
- A reading corner
- A bookshelf
- A gallery wall
- A seasonal mantel display
A colorful botanical design can brighten a kitchen, while a softer pattern may suit a bedroom or nursery. Small framed designs also work well on shelves where a larger print would feel overwhelming.
Common Problems and Easy Fixes
The Paper Keeps Curling
Place it beneath books for a little longer before framing. Secure all four edges to the back of the mat rather than attaching only the top.
The Paper Looks Wrinkled
Remove it from the frame and make sure it is lying naturally. Pulling thin paper too tightly can create ripples instead of smoothing them.
The Pattern Looks Crooked
Find a straight line within the design and align it with the edge of the mat. The outer edge of the wrapping paper itself may not be perfectly straight.
Tape Shows Through the Paper
Use smaller pieces and move them farther away from the mat opening. Pale or very thin paper may work better with photo corners.
The Paper Slips Inside the Frame
Add support at the bottom corners or along the side edges. Larger pieces often need more than one strip of tape at the top.
Dust Appears Under the Glass
Open the frame and clean it again under bright, indirect light. Tilting the glass slightly can make tiny pieces of dust easier to see.
A Simple Care Note
Ordinary gift wrap is easy to replace, so this project does not need to become complicated. However, it is still best to keep framed paper away from direct sunlight, radiators, and damp areas.
Light can gradually fade and discolor paper, while heat and moisture may cause it to wrinkle or deteriorate. The Library of Congress advises keeping framed paper away from direct or intense light and other unstable conditions.
When the paper has personal or collectible value, consider using acid-free backing, photo corners, and a mat that keeps it from resting directly against the glass.
An Easy Way to Make Your Walls More Personal
DIY wrapping paper art turns a simple sheet of decorative paper into affordable wall decor. The project is quick, beginner-friendly, and easy to customize for different rooms, seasons, and occasions.
Start with one frame and a leftover piece of paper you already love. Once you see how polished it looks behind glass, you may start saving the best section of every roll.