DIY Night Sky Print Tutorial
Hi Friends,
I was browsing for some art work ideas on pinterest and came across these night sky prints and absolutely loved it! The idea is that you submit a location and date of a memorable date / event (think wedding, engagement, birth, honeymoon, memorable vacation, etc.) and you will receive a print of the what the stars and night sky would have looked like at that exact time and location.
Because I am who I am, I then thought to myself … “is this something I can make ???” and ended up with this ! Thought I’d share the process with you all to inspire you to make your own night sky.
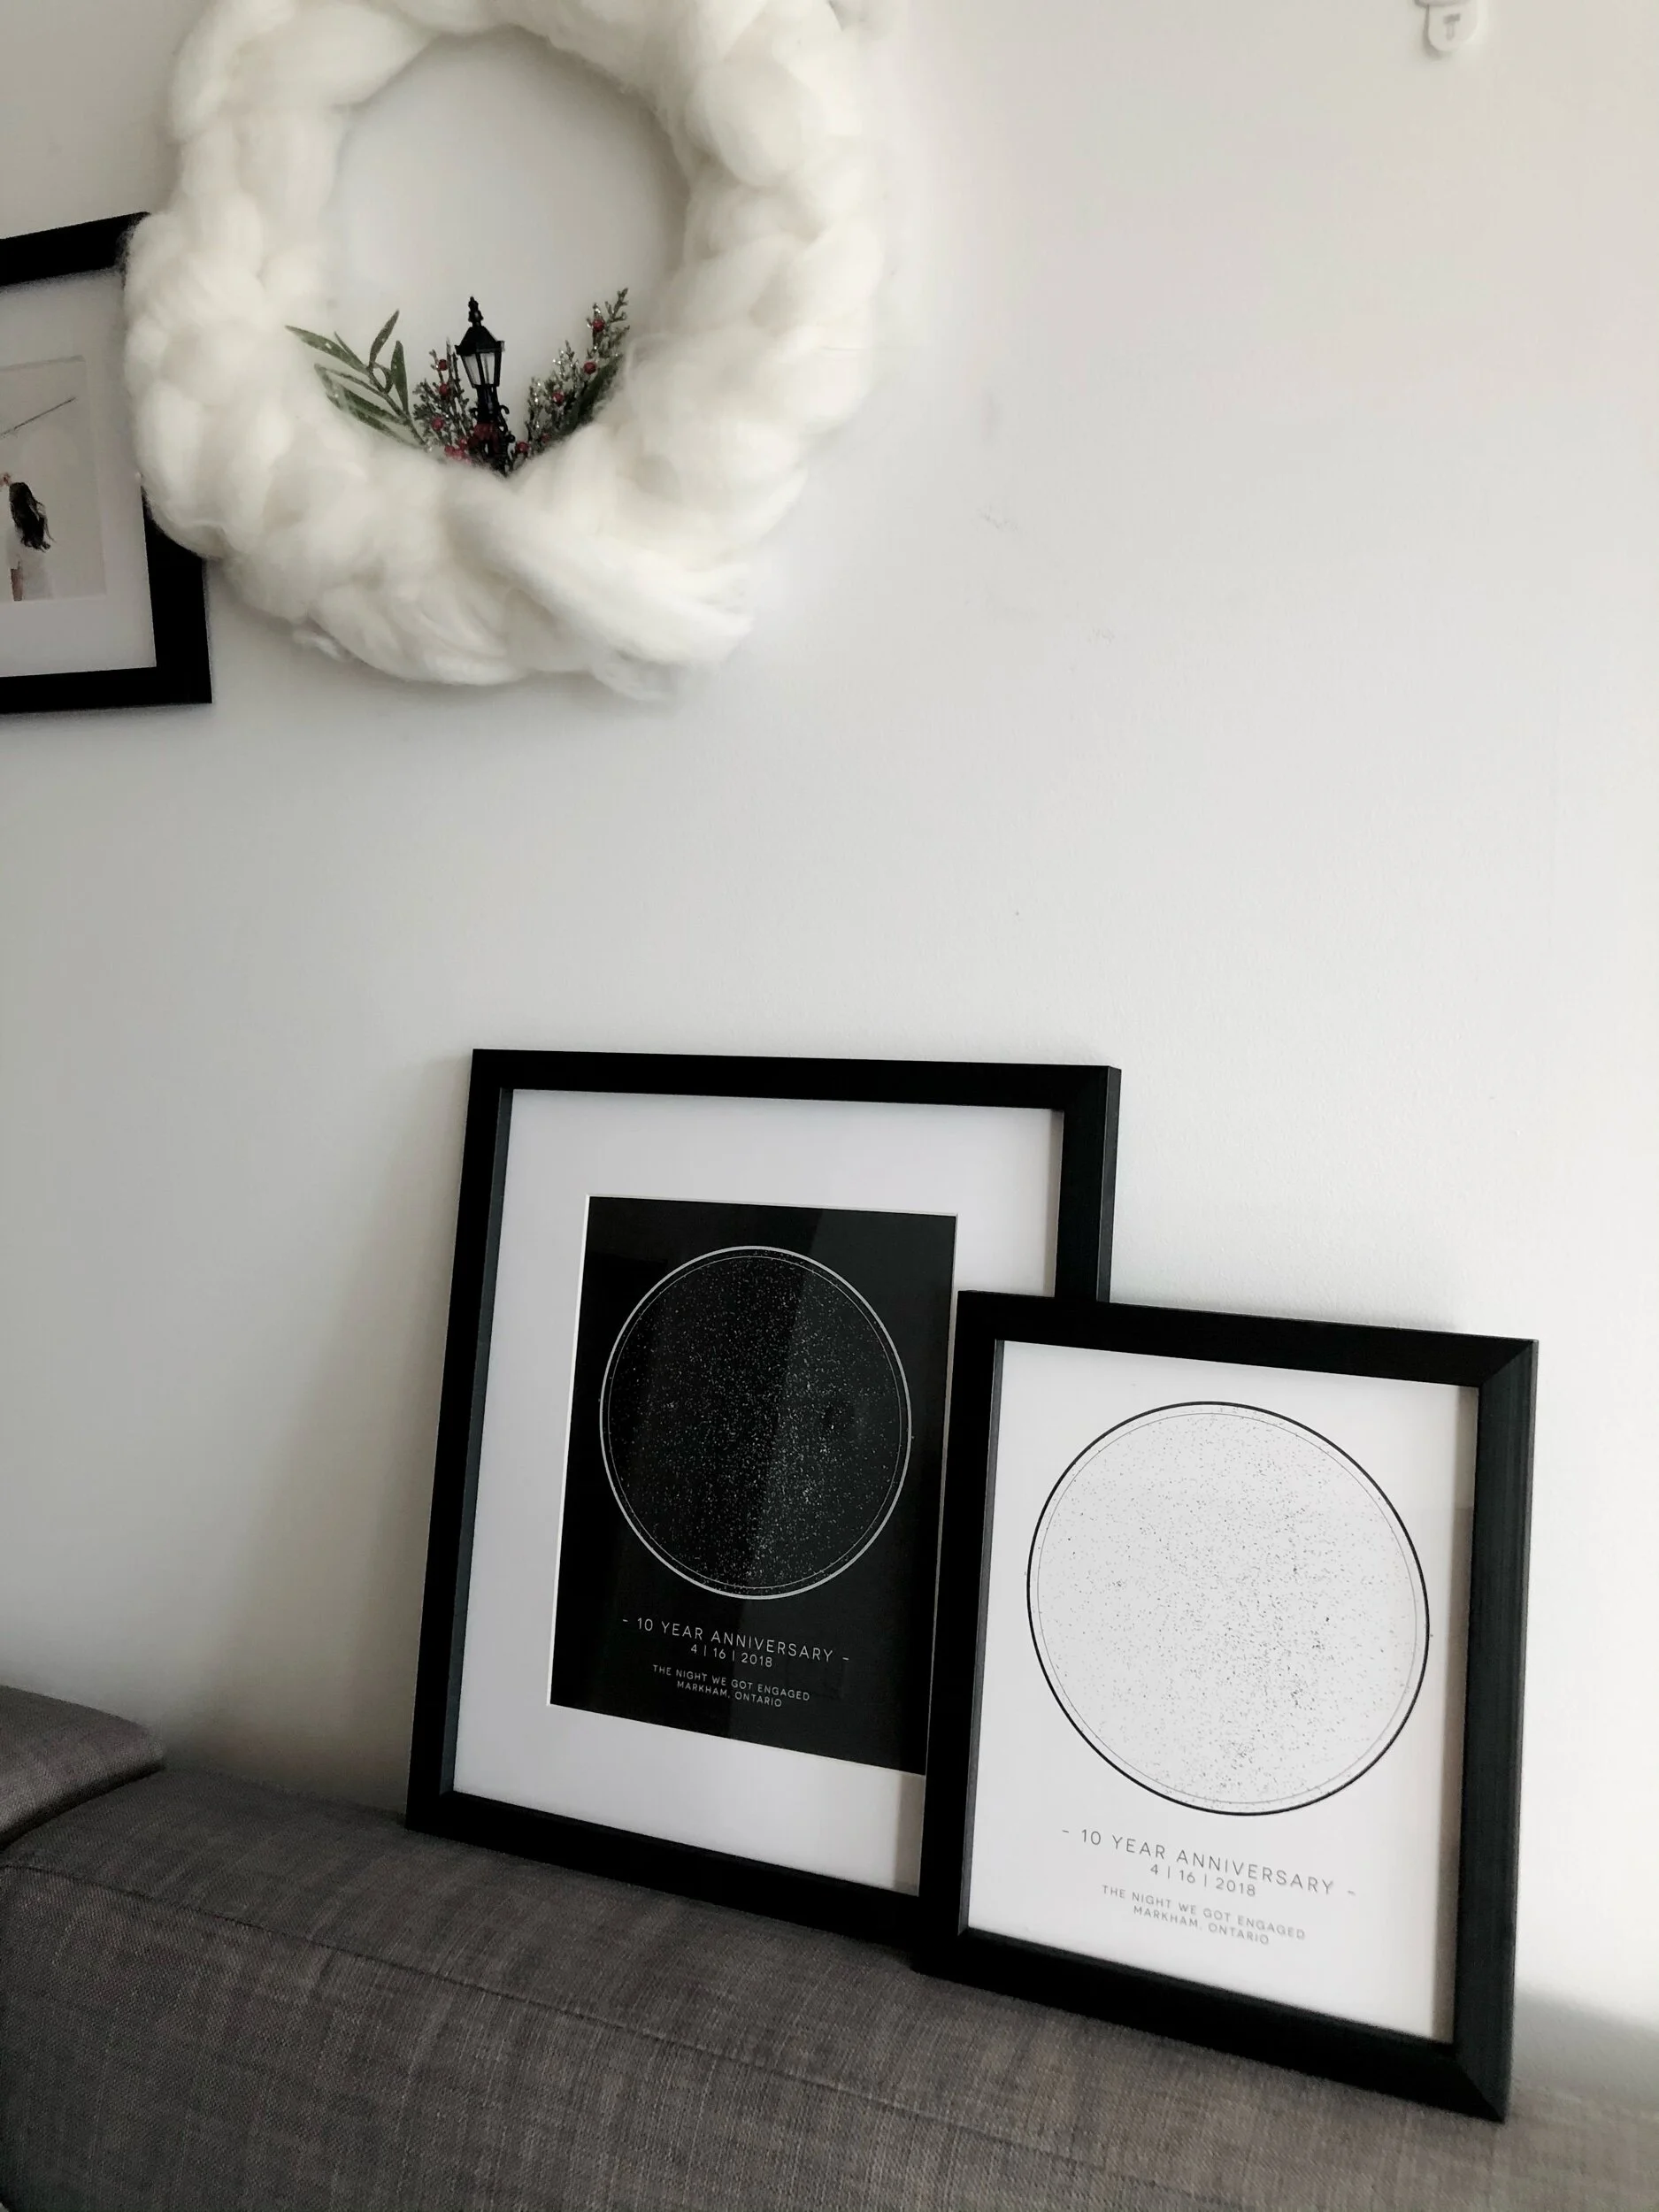
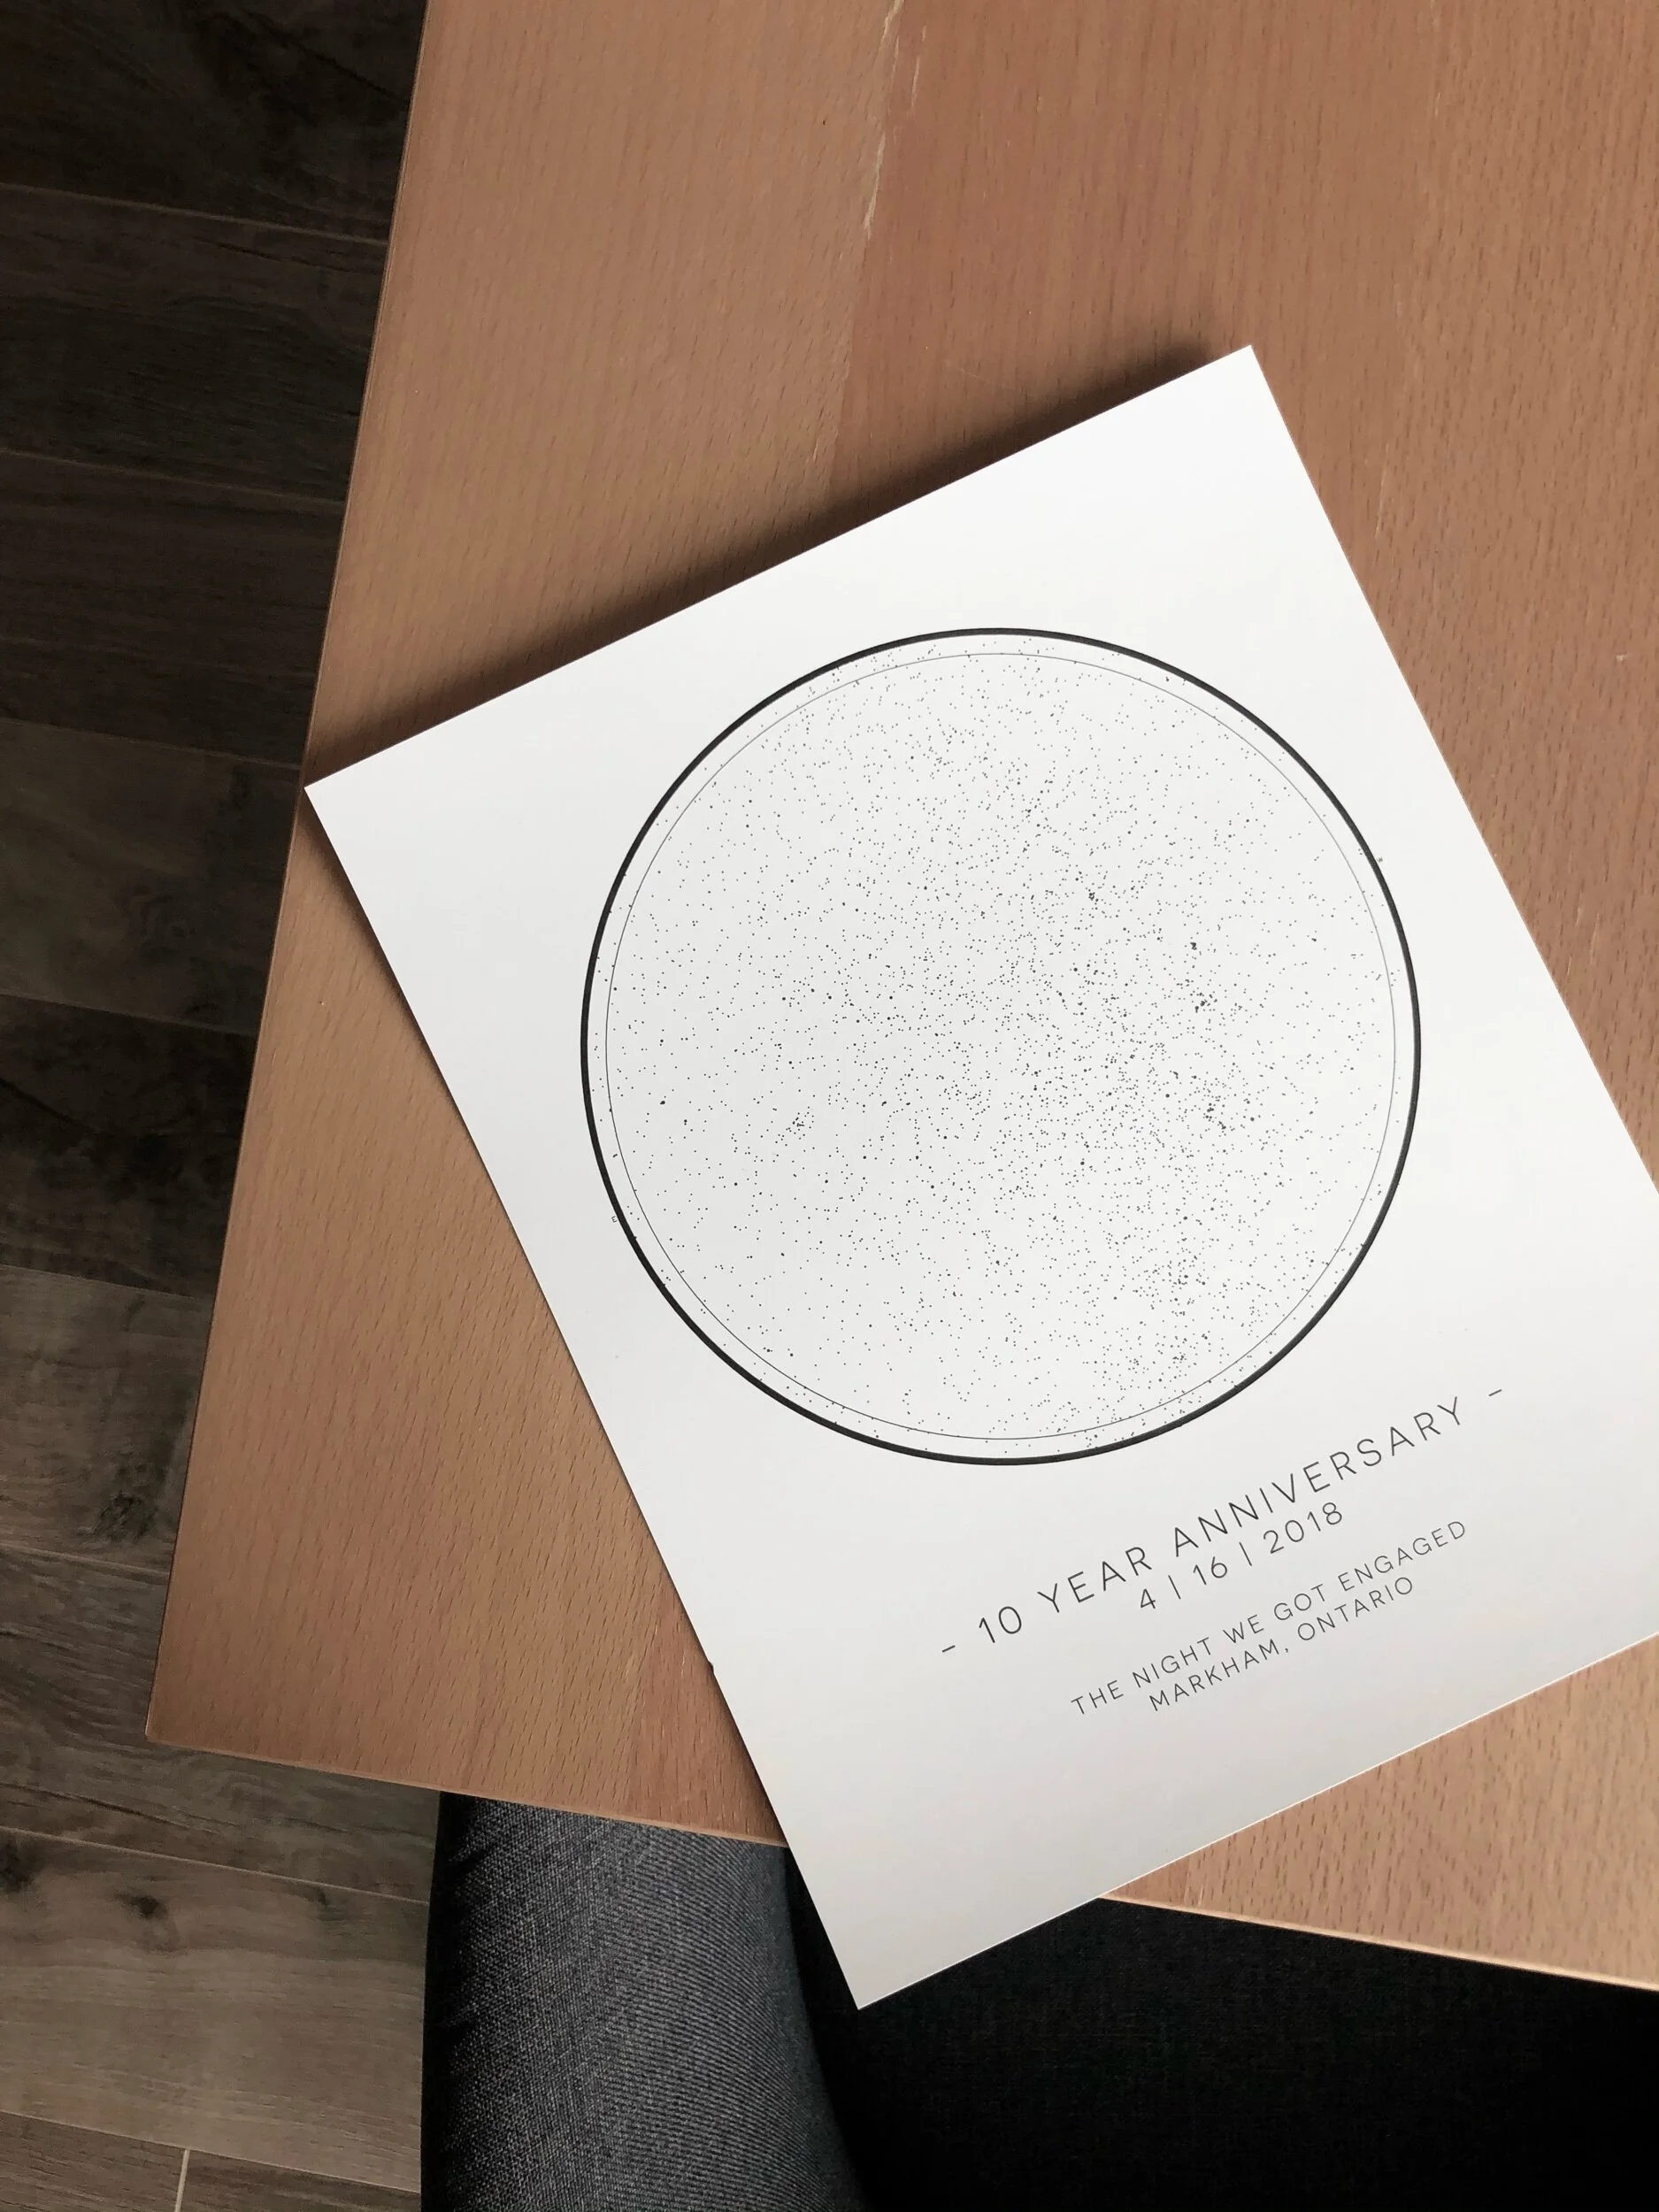
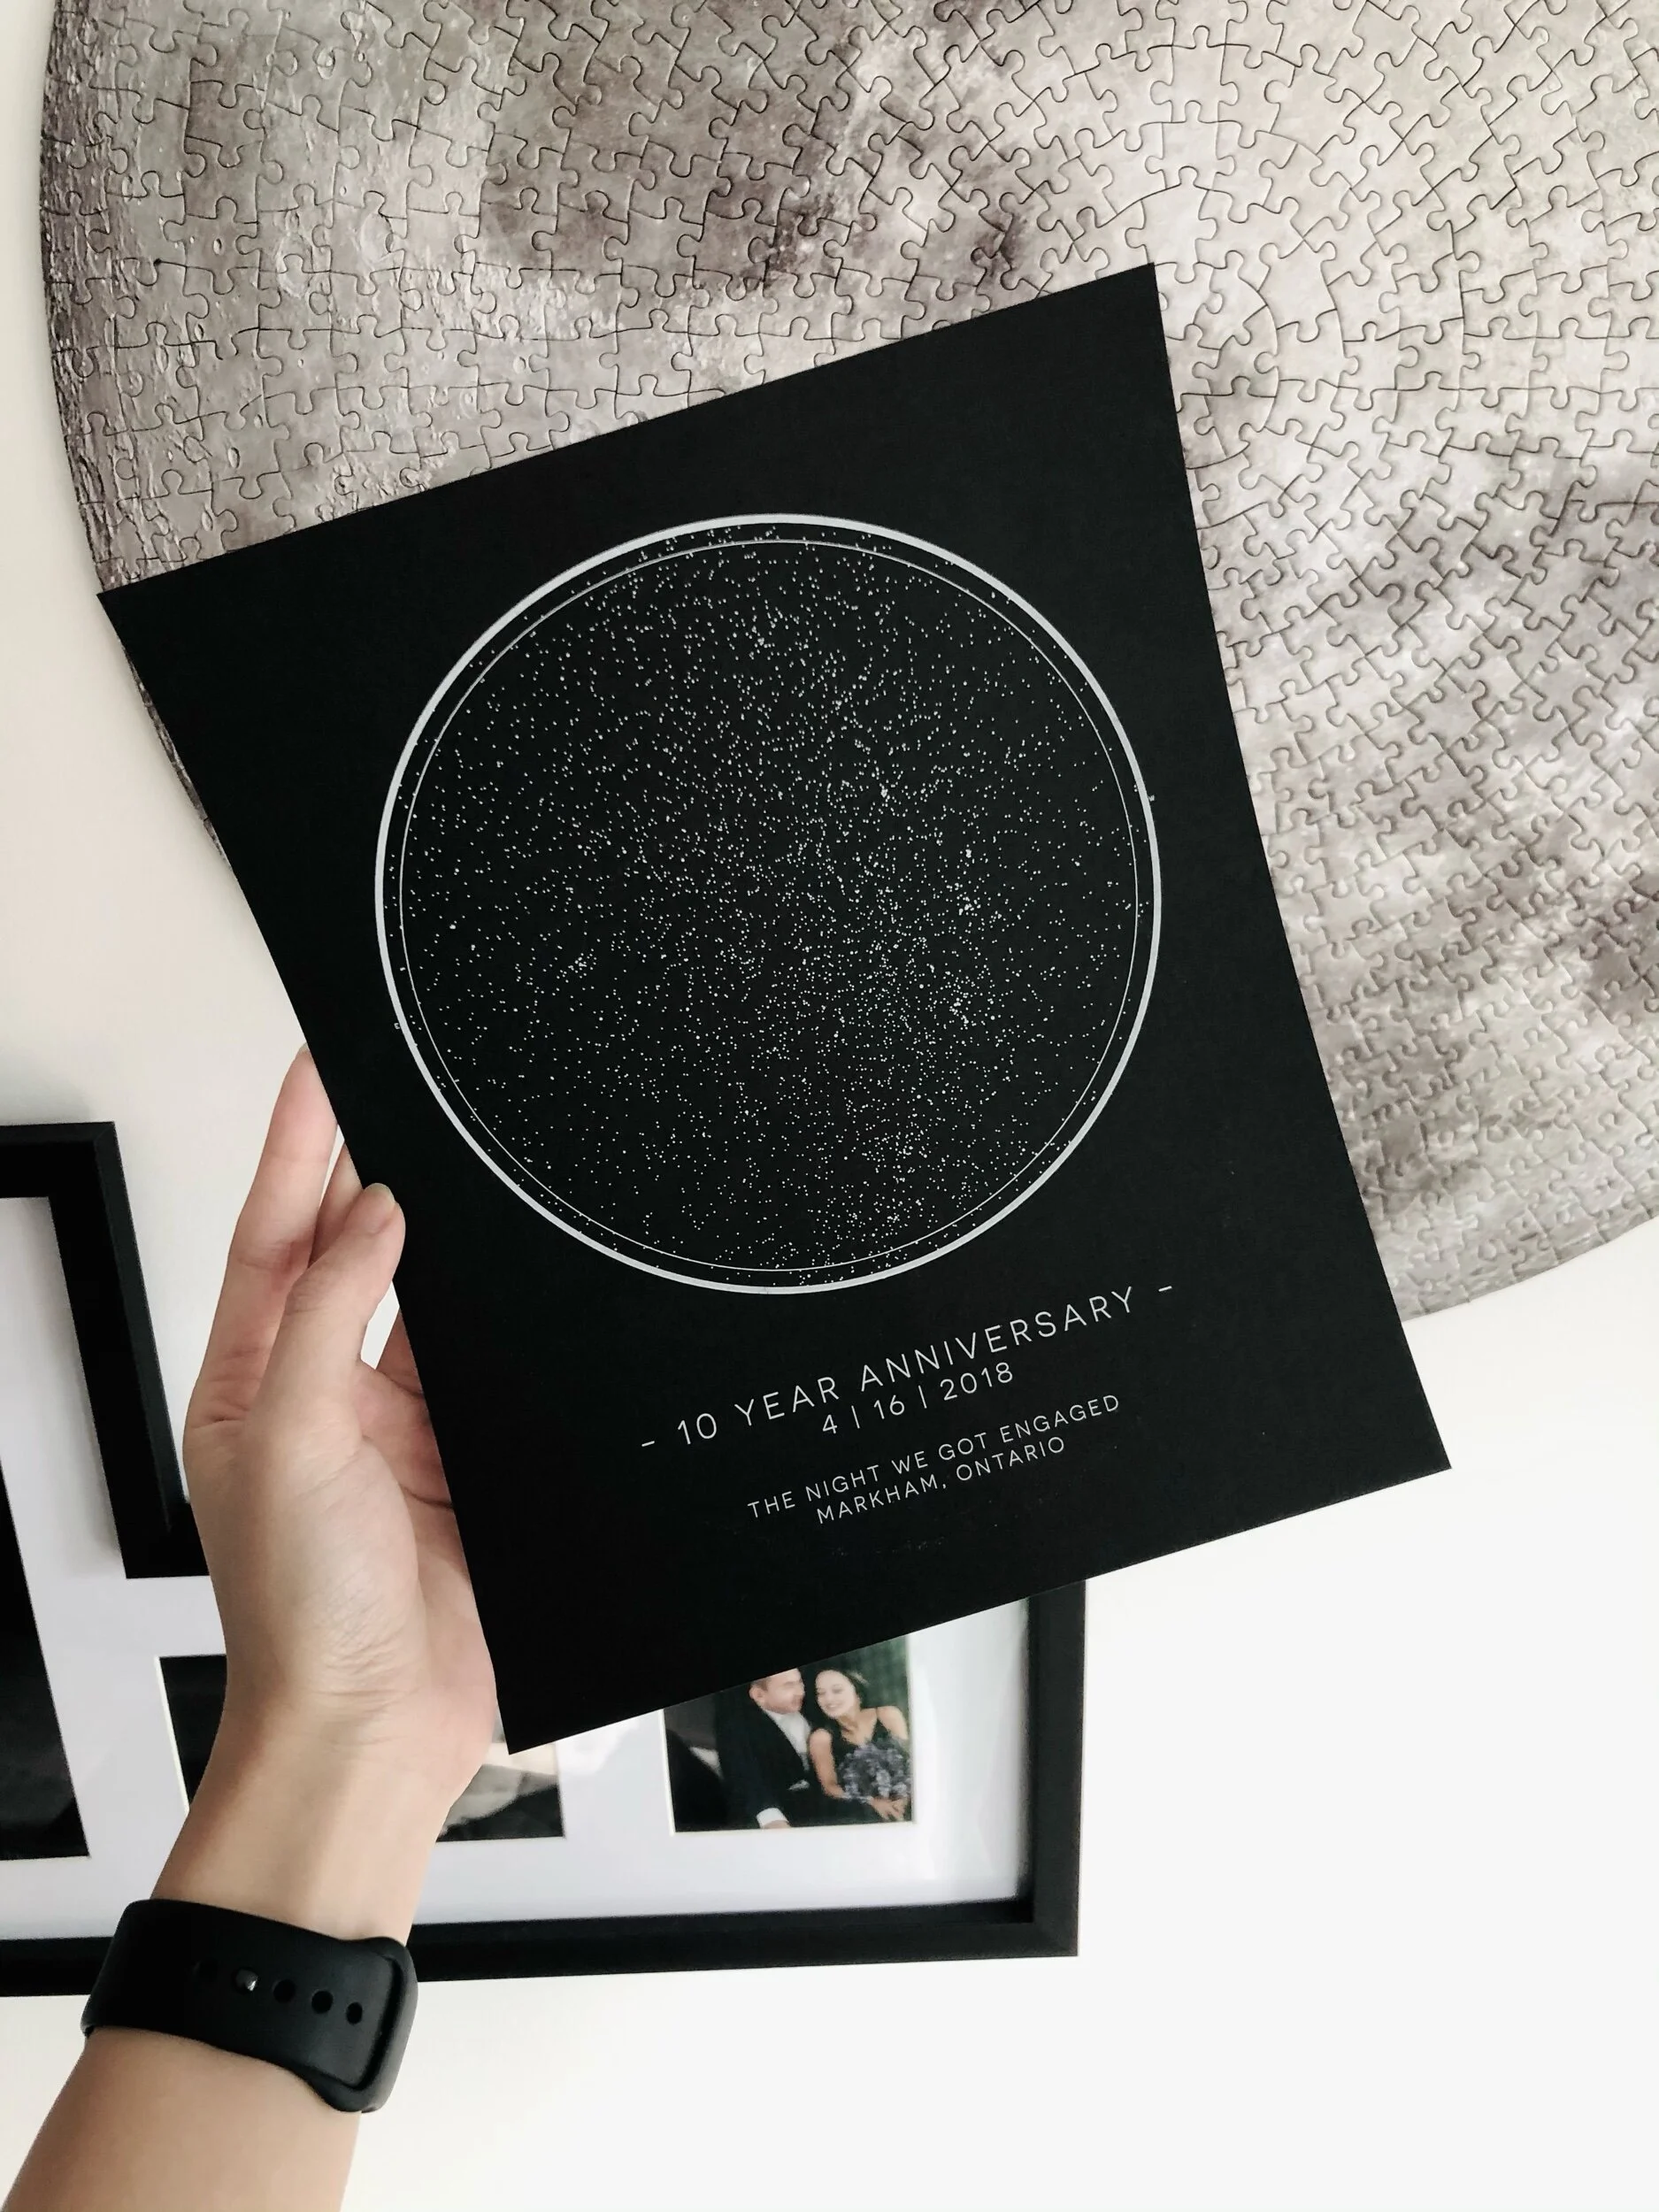
On the left is an 8” x 10’ print framed with a mat, and on the right without a mat.
DIY NIGHT SKY Tutorial
Determine the time and date of your event that you want to commemorate. I decided to go with April 16, 2018 7:30pm. It was our 10 year dating anniversary and the night he proposed.
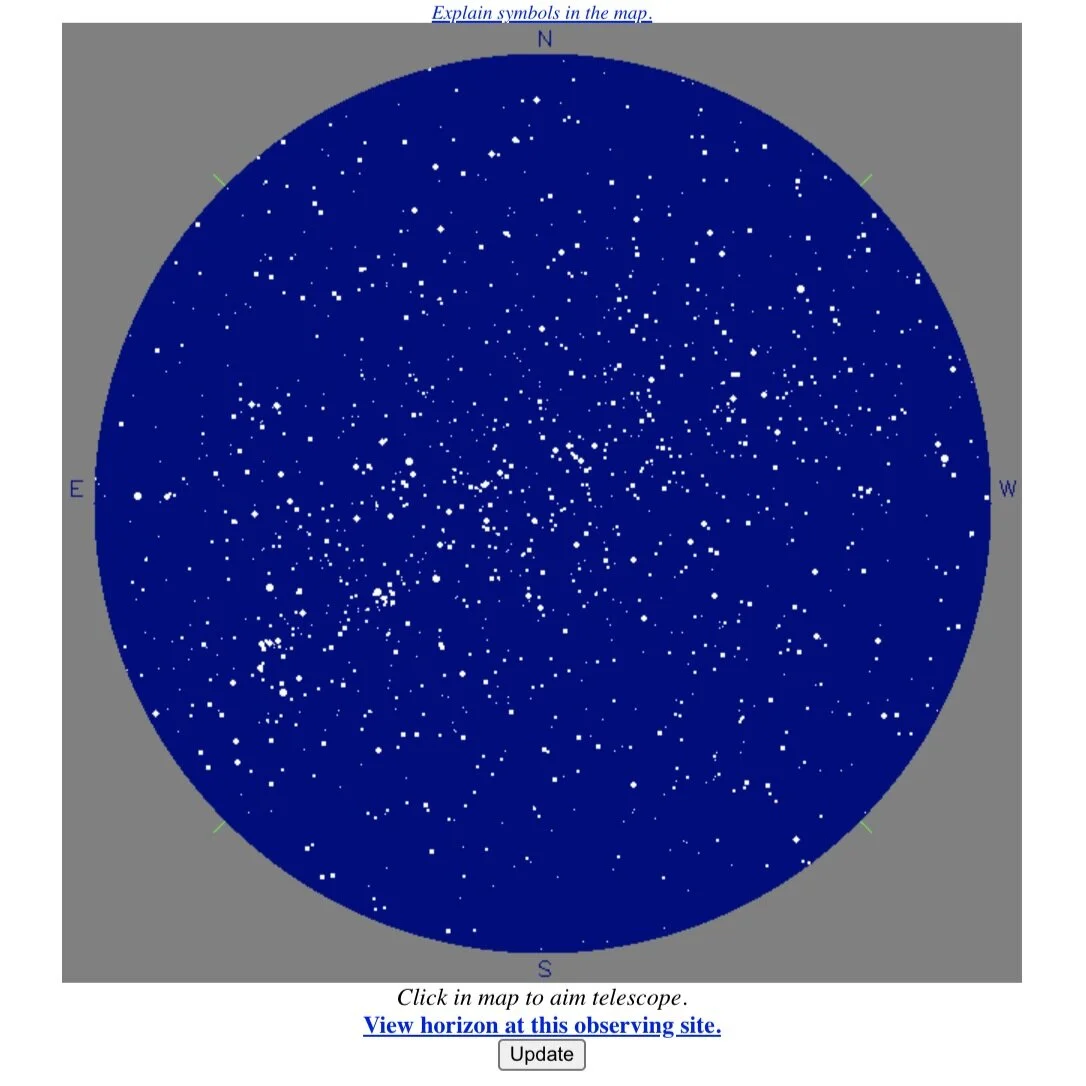
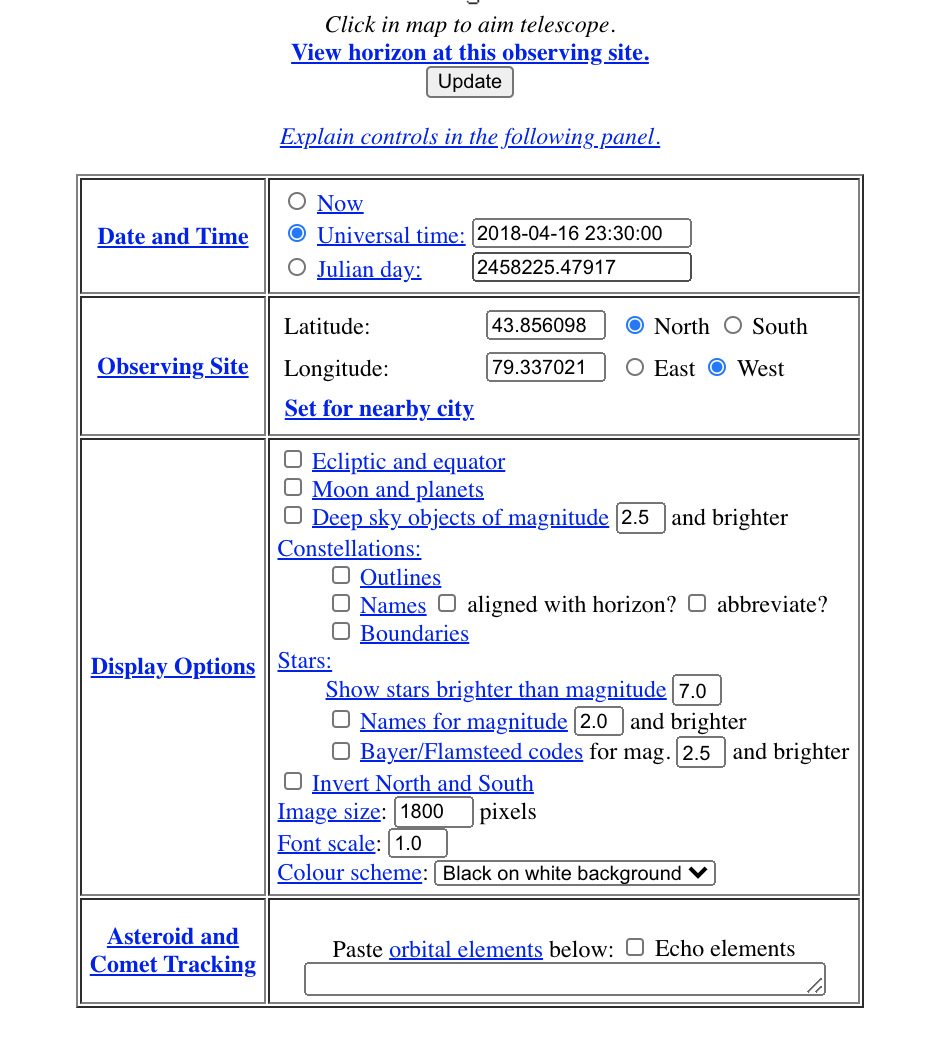
Go to https://www.fourmilab.ch/cgi-bin/Yoursky - this is a free option I found to generate the night sky. You should see something like this. Next we will go through all the inputs together.
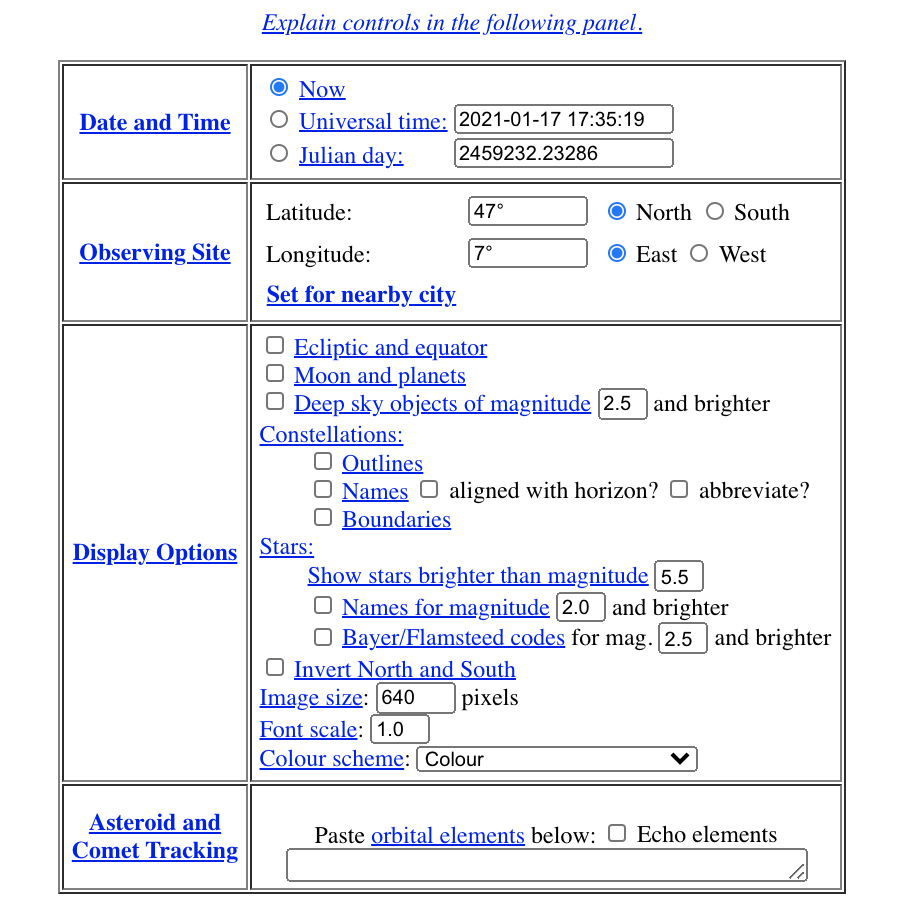
inputs
STEP 1 - Date / Time - convert your date/time into universal time (UTC).
Input your location / time that you want to commemorate
Check the box at the bottom that says “Include UTC time in results”
In my example, April 16, 2018 EDT translates to April 16, 2018 23:30.
Input that into the “Date and Time” and select Universal Time.

STEP 2 - Observing Site - translate your location to coordinates
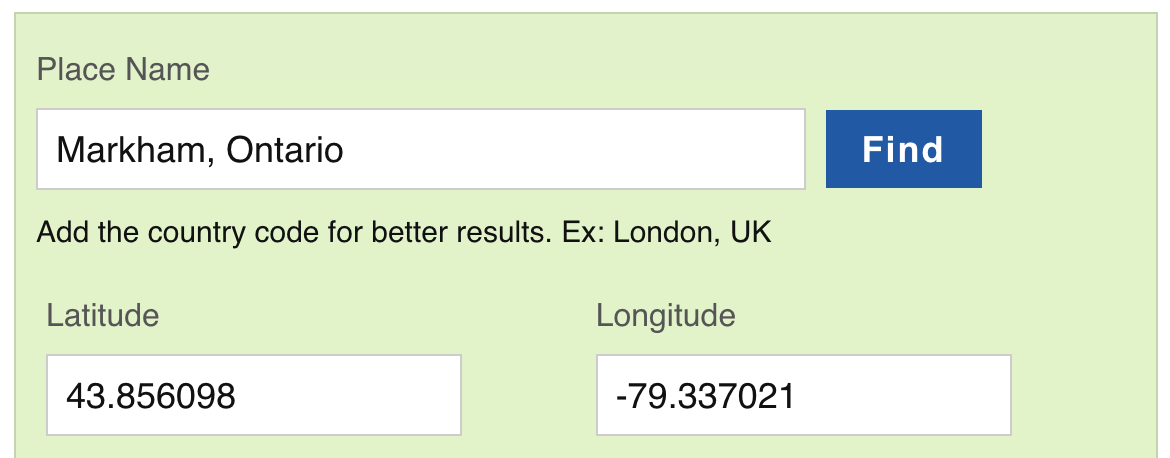
Go to https://www.latlong.net/ and punch in the location to determine the longitude and latitude
In my example, Markham, Ontario translates to Latitude 43.856098 and Longitude -79.337021
Note that a positive latitude number means North, negative means South. Subsequently, a positive longitude number means East, negative means West.
Copy and paste the results into the respective cells and remember to remove the negative sign and toggle the appropriate North / South / East / West options.
Step 3 - Display Options
Here you can select the different options you like. I’ll attach a screenshot below of the final criteria I used, but feel free to toggle around the options to see what you like best! I deselected everything and only included stars greater than 7.0 magnititude for my personal print.
In the colour scheme toggle, I would recommend either doing white on black or black on white depending on the look you are going for.
Type in the size of the image you’d like to generate - you’ll need at least 1200 pixels for a letter sized print, I went with 1800 for a 8” x 10” print.
STEP 4 - hit update to generate your own Map!
Here’s a screenshot of all my final inputs
Hit the “Update” button
Then you should see a map of your night sky. Feel free here to keep toggling your Display Options to get the final starry map you’d like.
Once you’re happy with the image, right click and save the image or copy the image to prepare your print.
step 5 - create your print and frame it
Using photoshop, illustrator, or simply Microsoft Word, copy and paste your map into the editing program you choose.
Add your custom text and design elements as you please and save the file.
In terms of the print, you can send it to your local print shop or print at home if you have a printer. I have a white ink printer in my home studio so I opted to print white ink on black paper. I also printed black ink on white paper (easily doable with a home printer).
Find the perfect frame for your prints and voila !
A few print tips
If printing at home, I suggest designing and printing for 8” x 10”. Typical home printers can print up to 8.5” x 11” and most frames you will find are in 8” x 10”.
To have a bigger impact, you can go for an 8” x 10” frame with a mat.
And in the case you don’t want to go down the DIY route, feel free to E-Mail us to help you customize and design your own! We can even source the frames for you as the perfect gift for your most memorable moment.s
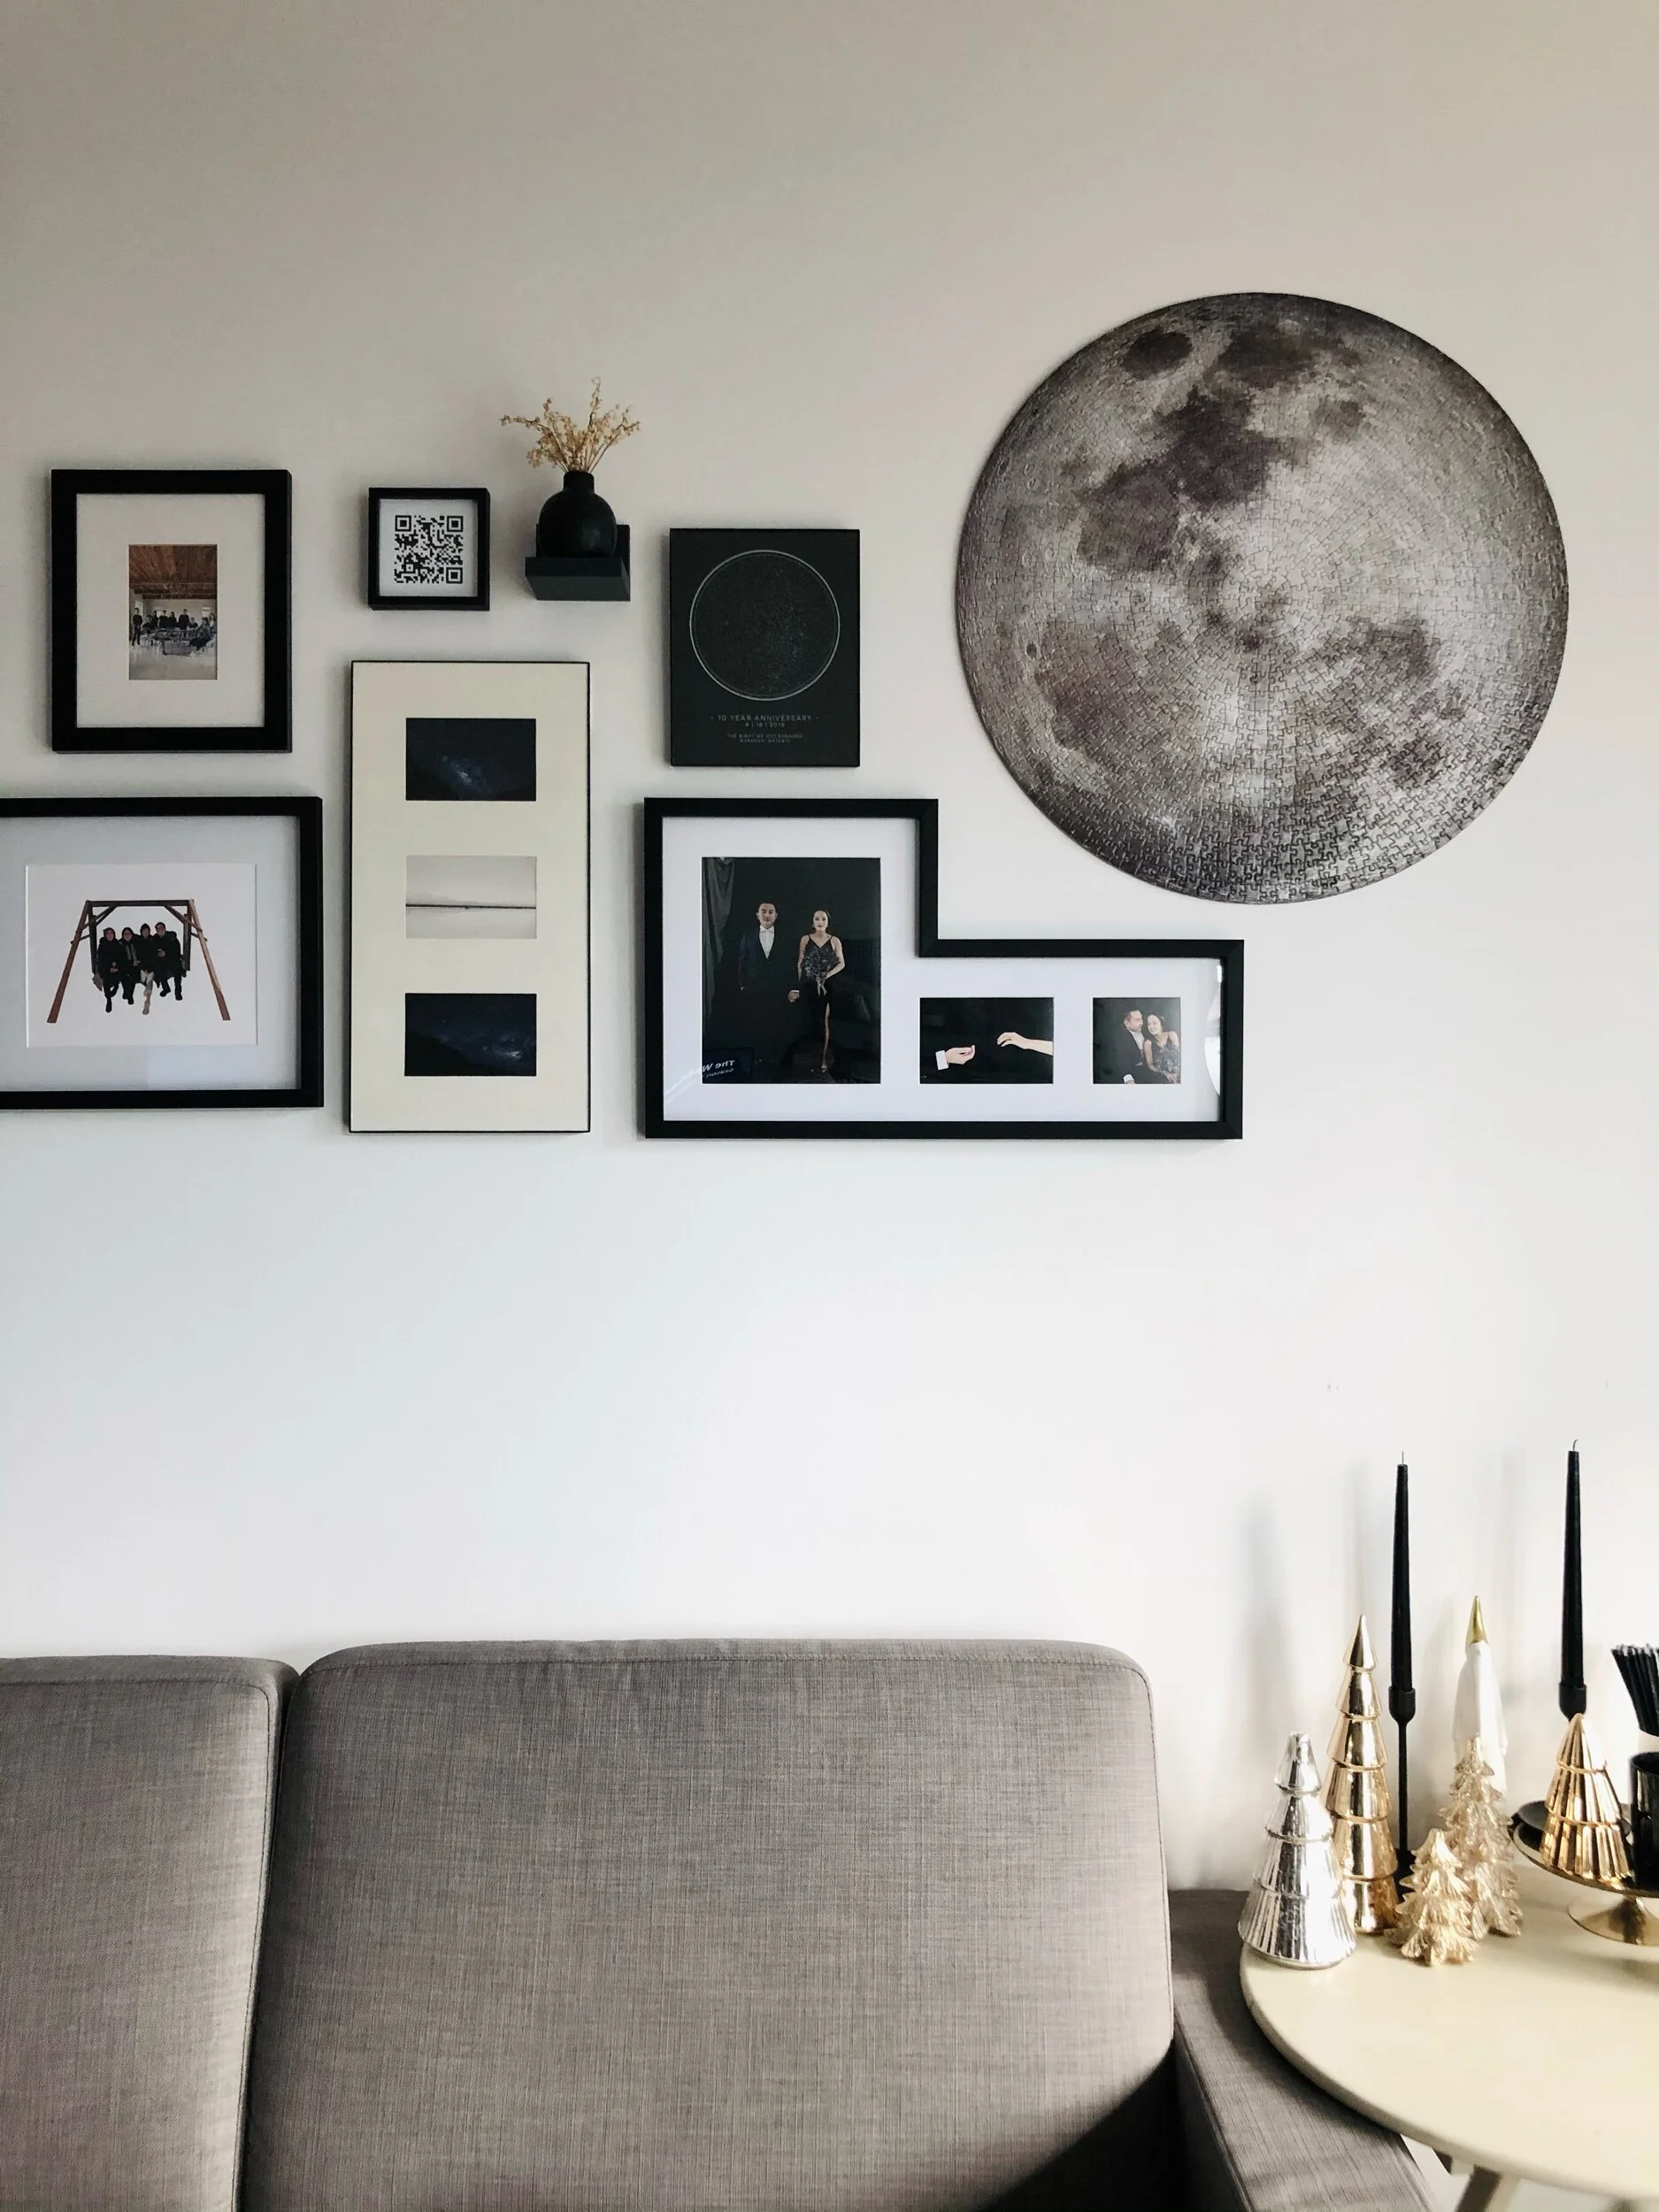
Framed without a mat, beside our Moon Puzzle by Four Point Puzzles
Hope this helps get you started on making your own night sky print to help commemorate your life events ! Comment below if you have any questions on the process - happy to hear how your DIYs go!
Cheers,
Vivian